immich
Self-hosted photo and video management solution immich
immich installation
Docker
Install Docker Compose
sudo curl -L "https://github.com/docker/compose/releases/latest/download/docker-compose-linux-$(uname -m)" -o /usr/local/bin/docker-compose
sudo chmod +x /usr/local/bin/docker-compose
Set up Docker's apt repository & Add Docker's official GPG key
sudo apt-get update
sudo apt-get install ca-certificates curl
sudo install -m 0755 -d /etc/apt/keyrings
sudo curl -fsSL https://download.docker.com/linux/ubuntu/gpg -o /etc/apt/keyrings/docker.asc
sudo chmod a+r /etc/apt/keyrings/docker.asc
Add the repository to apt sources
echo \
"deb [arch=$(dpkg --print-architecture) signed-by=/etc/apt/keyrings/docker.asc] https://download.docker.com/linux/ubuntu \
$(. /etc/os-release && echo "$VERSION_CODENAME") stable" | \
sudo tee /etc/apt/sources.list.d/docker.list > /dev/null
sudo apt-get update
Install the Docker packages
sudo apt-get install docker-ce docker-ce-cli containerd.io docker-buildx-plugin docker-compose-plugin
Create the docker group
Add your user to the docker group
activate the changes to groups
TO ENABLE DOCKER START ON BOOT
Install Immich with Docker
Immich directory and configuration files
create a “docker-compose.yaml” file
docker-compose.yaml configuration
Update the DB_PASSWORD variable, enter a randomly created string that will serve as the password for your PostgreSQL user during the initial deployment.
name: immich

services:
immich-server:
    container_name: immich_server
    image: ghcr.io/immich-app/immich-server:${IMMICH_VERSION:-release}
    # extends:
    #   file: hwaccel.transcoding.yml
    #   service: cpu # set to one of [nvenc, quicksync, rkmpp, vaapi, vaapi-wsl] for accelerated transcoding
    volumes:
    # Do not edit the next line. If you want to change the media storage location on your system, edit the value of UPLOAD_LOCATION in the .env file
    - ${UPLOAD_LOCATION}
    - /etc/localtime:/etc/localtime:ro
    env_file:
    - stack.env
    ports:
    - 2283:3001
    depends_on:
    - redis
    - database
    restart: always

immich-machine-learning:
    container_name: immich_machine_learning
    # For hardware acceleration, add one of -[armnn, cuda, openvino] to the image tag.
    # Example tag: ${IMMICH_VERSION:-release}-cuda
    image: ghcr.io/immich-app/immich-machine-learning:${IMMICH_VERSION:-release}
    # extends: # uncomment this section for hardware acceleration - see https://immich.app/docs/features/ml-hardware-acceleration
    #   file: hwaccel.ml.yml
    #   service: cpu # set to one of [armnn, cuda, openvino, openvino-wsl] for accelerated inference - use the `-wsl` version for WSL2 where applicable
    volumes:
    - /volume25/docker/immich/upload:/usr/src/app/upload:rw
    - /volume25/docker/immich/cache:/cache:rw
    env_file:
    - stack.env
    restart: always

redis:
    container_name: immich_redis
    image: docker.io/redis:6.2-alpine@sha256:e3b17ba9479deec4b7d1eeec1548a253acc5374d68d3b27937fcfe4df8d18c7e
    healthcheck:
    test: redis-cli ping || exit 1
    restart: always

database:
    container_name: immich_postgres
    image: tensorchord/pgvecto-rs:pg16-v0.2.0
    environment:
    POSTGRES_PASSWORD: ${DB_PASSWORD}
    POSTGRES_USER: ${DB_USERNAME}
    POSTGRES_DB: ${DB_DATABASE_NAME}
    POSTGRES_INITDB_ARGS: '--data-checksums'
    volumes:
    # Do not edit the next line. If you want to change the database storage location on your system, edit the value of DB_DATA_LOCATION in the .env file
    - ${DB_DATA_LOCATION}
    healthcheck:
    test: pg_isready --dbname='${DB_DATABASE_NAME}' --username='${DB_USERNAME}' || exit 1; Chksum="$$(psql --dbname='${DB_DATABASE_NAME}' --username='${DB_USERNAME}' --tuples-only --no-align --command='SELECT COALESCE(SUM(checksum_failures), 0) FROM pg_stat_database')"; echo "checksum failure count is $$Chksum"; [ "$$Chksum" = '0' ] || exit 1
    interval: 5m
    start_interval: 30s
    start_period: 5m
    command: ["postgres", "-c" ,"shared_preload_libraries=vectors.so", "-c", 'search_path="$$user", public, vectors', "-c", "logging_collector=on", "-c", "max_wal_size=2GB", "-c", "shared_buffers=512MB", "-c", "wal_compression=on"]
    restart: always

volumes:
model-cache:
create a “.env” file
.env file configuration
openssl rand -base64 128 to generate random JWT Secret
Make sure to update the location of where your files will be saved UPLOAD_LOCATION=<directory_path>., for example, “UPLOAD_LOCATION=/mystorage/images.”
UPLOAD_LOCATION=/volume25/docker/immich/redis:/data:rw
IMMICH_VERSION=release
DB_PASSWORD=xxxxxx
JWT_SECRET=xxxxxx

# The values below this line do not need to be changed
######################################################
DB_HOSTNAME=immich
DB_USERNAME=xxxxxx
DB_DATABASE_NAME=xxxxxx
DB_DATA_LOCATION=/volume1/docker/immich/db:/var/lib/postgresql/data:rw
REDIS_HOSTNAME=redis
IMMICH_WEB_URL=http://10.10.10.31:3000
IMMICH_SERVER_URL=http://10.10.10.31:3001
DISABLE_REVERSE_GEOCODING=false
REVERSE_GEOCODING_PERCISION=3
LOG_LEVEL=log
Open your browser to http://127.0.0.1:2283 and continue your setup.
In order to recreate the container using docker compose, run docker compose up -d. In most cases docker will recognize that the .env file has changed and recreate the affected containers. If this should not work, try running docker compose up -d --force-recreate
Synology NAS + Portainer + Docker
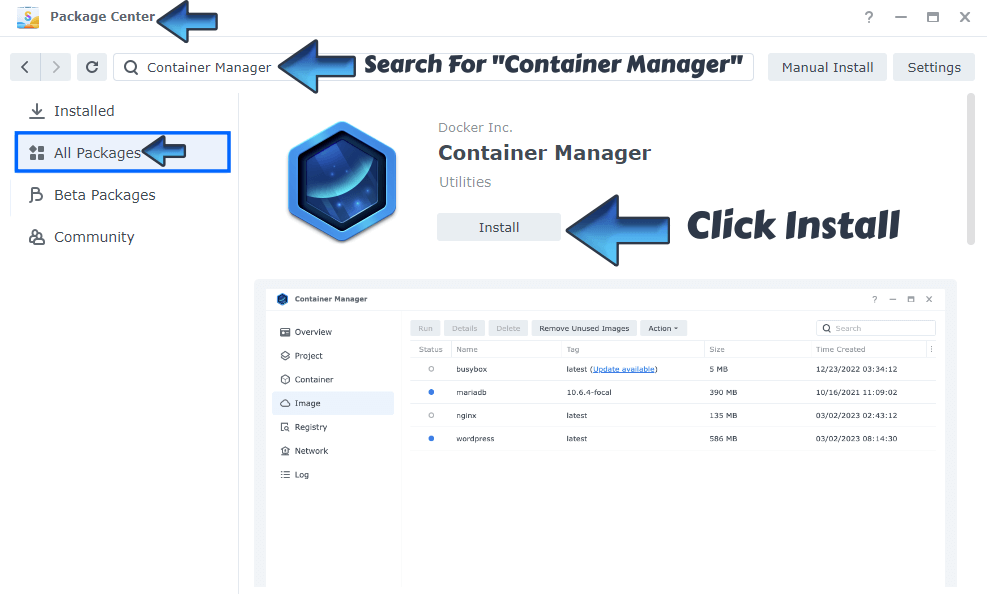
Install Container Manager
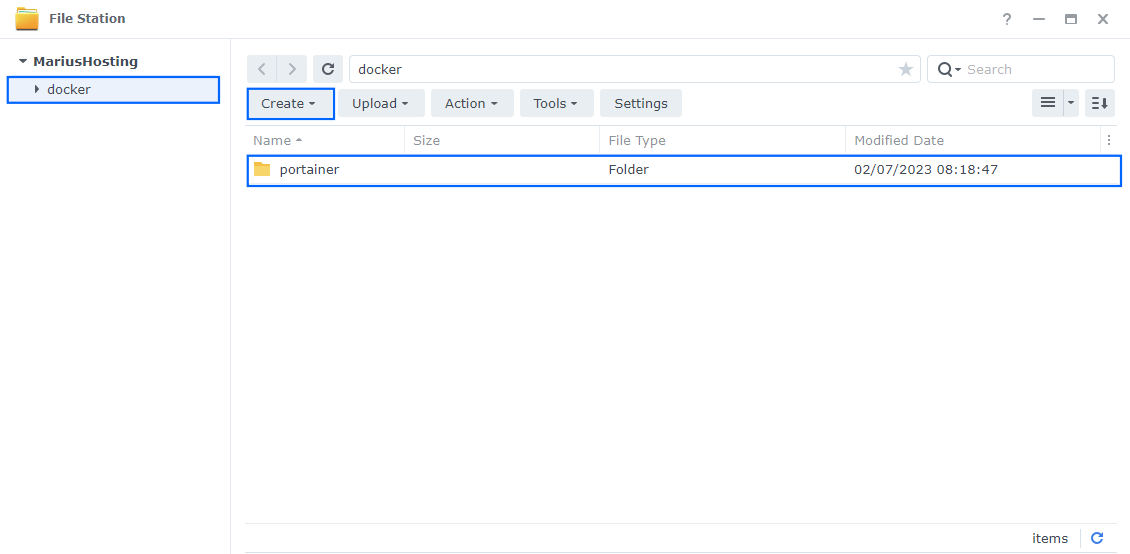
Folder Structure
Create the following folder structure in 'File Station'. lowercase naming only!
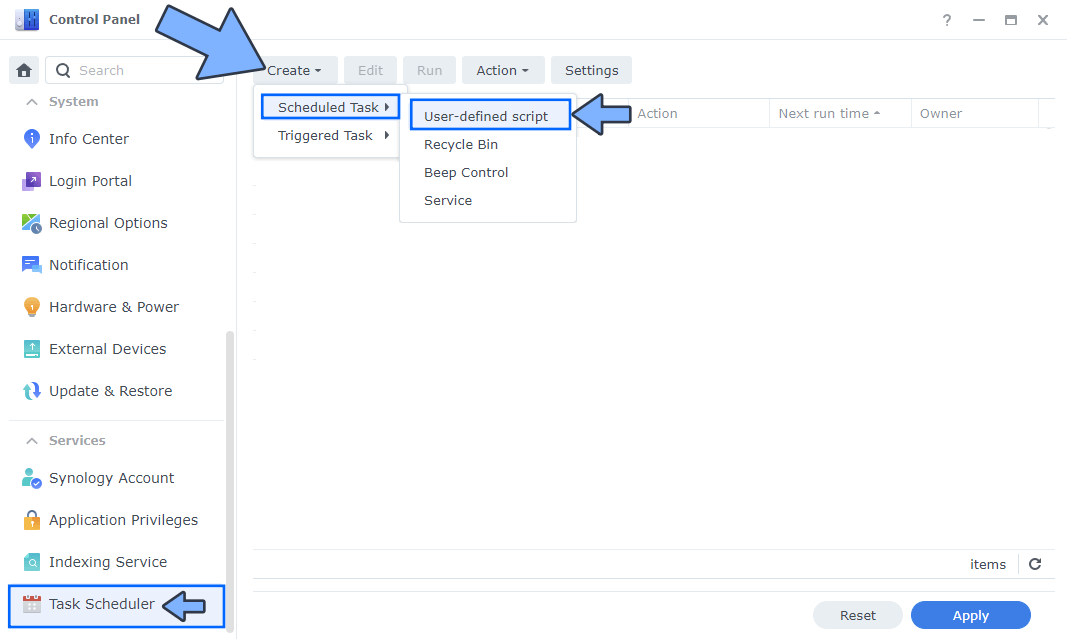
Scheduled Tasks
Control Panel > Task Scheduler > Create > Scheduled Task > User-defined script
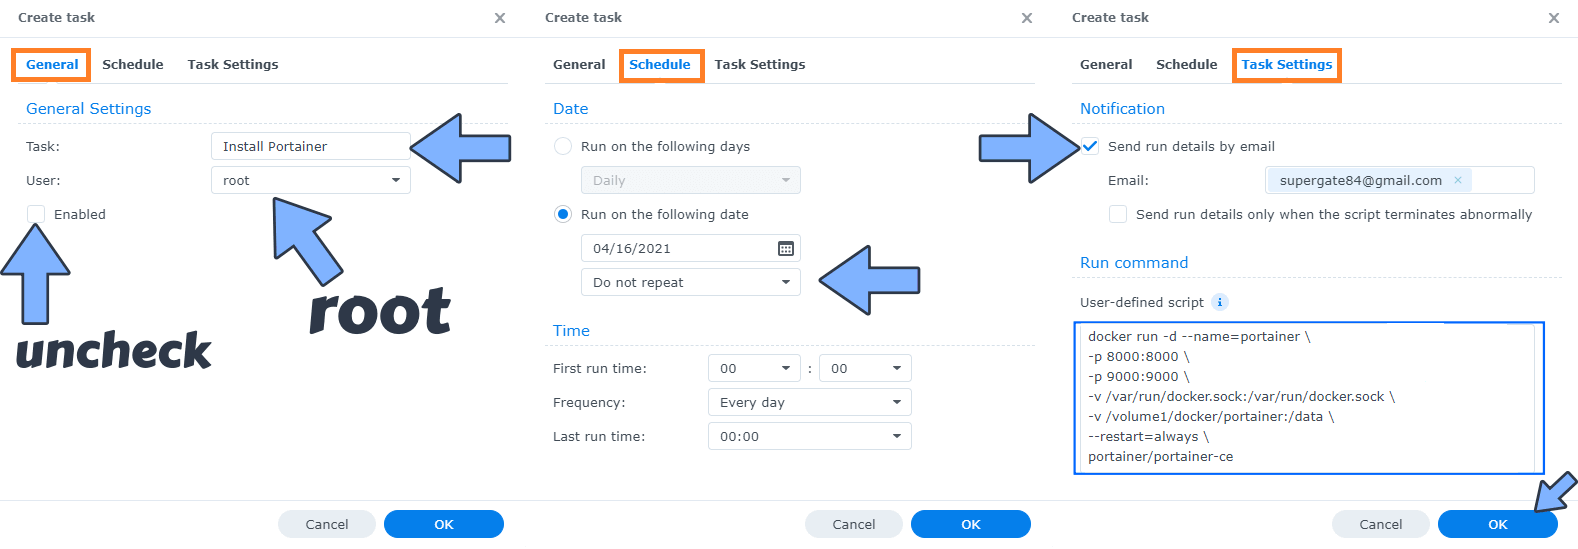
- General: In the Task field type in “Install Portainer“. Uncheck the “Enabled” option. Select root User.
- Schedule: Select Run on the following date then select “Do not repeat“.
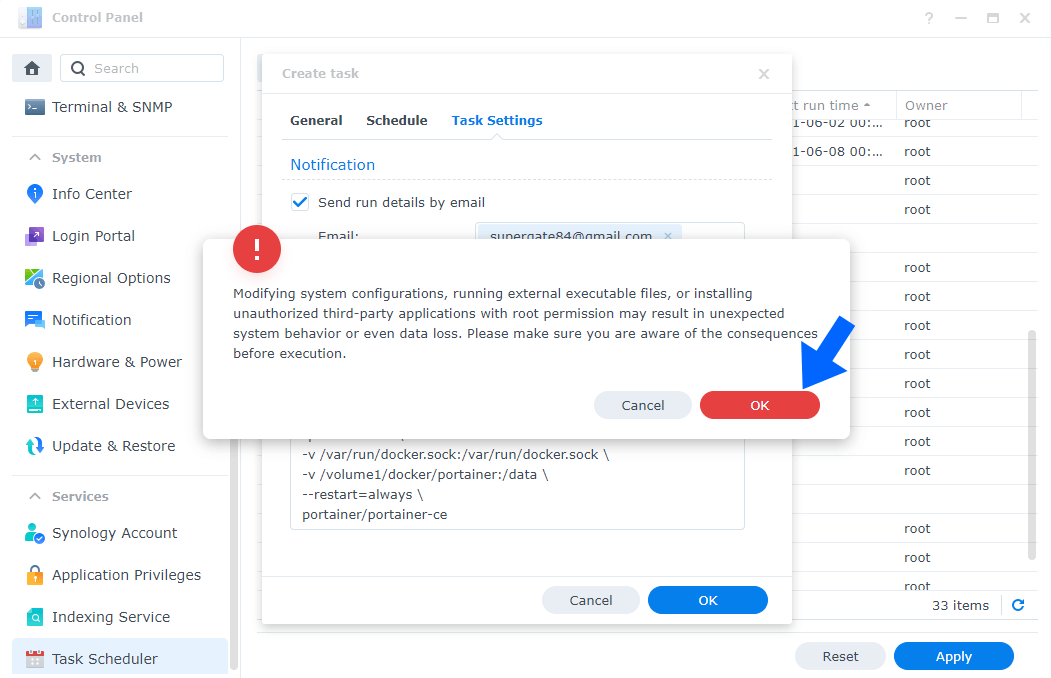
- Task Settings: Check “Send run details by email“, add your email, then copy paste the code below in the Run command area. After that, click OK.
docker run -d --name=portainer \
-p 8000:8000 \
-p 9000:9000 \
-p 9443:9443 \
-v /var/run/docker.sock:/var/run/docker.sock \
-v /volume1/docker/portainer:/data \
--restart=always \
portainer/portainer-ce
warning pop up window will open. Click OK
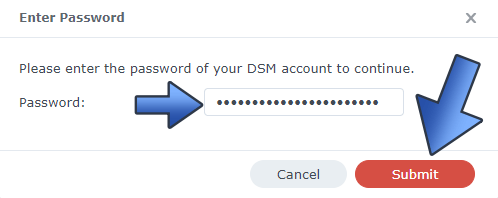
Type your DSM password
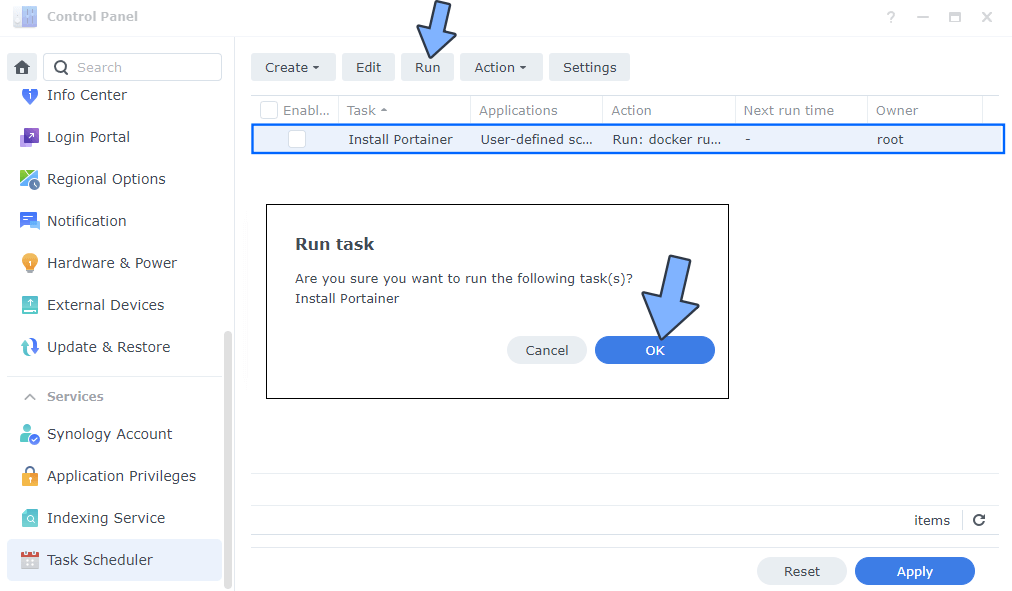
select your “Install Portainer” Task, then click the “Run” tab. You will be asked to run Install Portainer – click OK
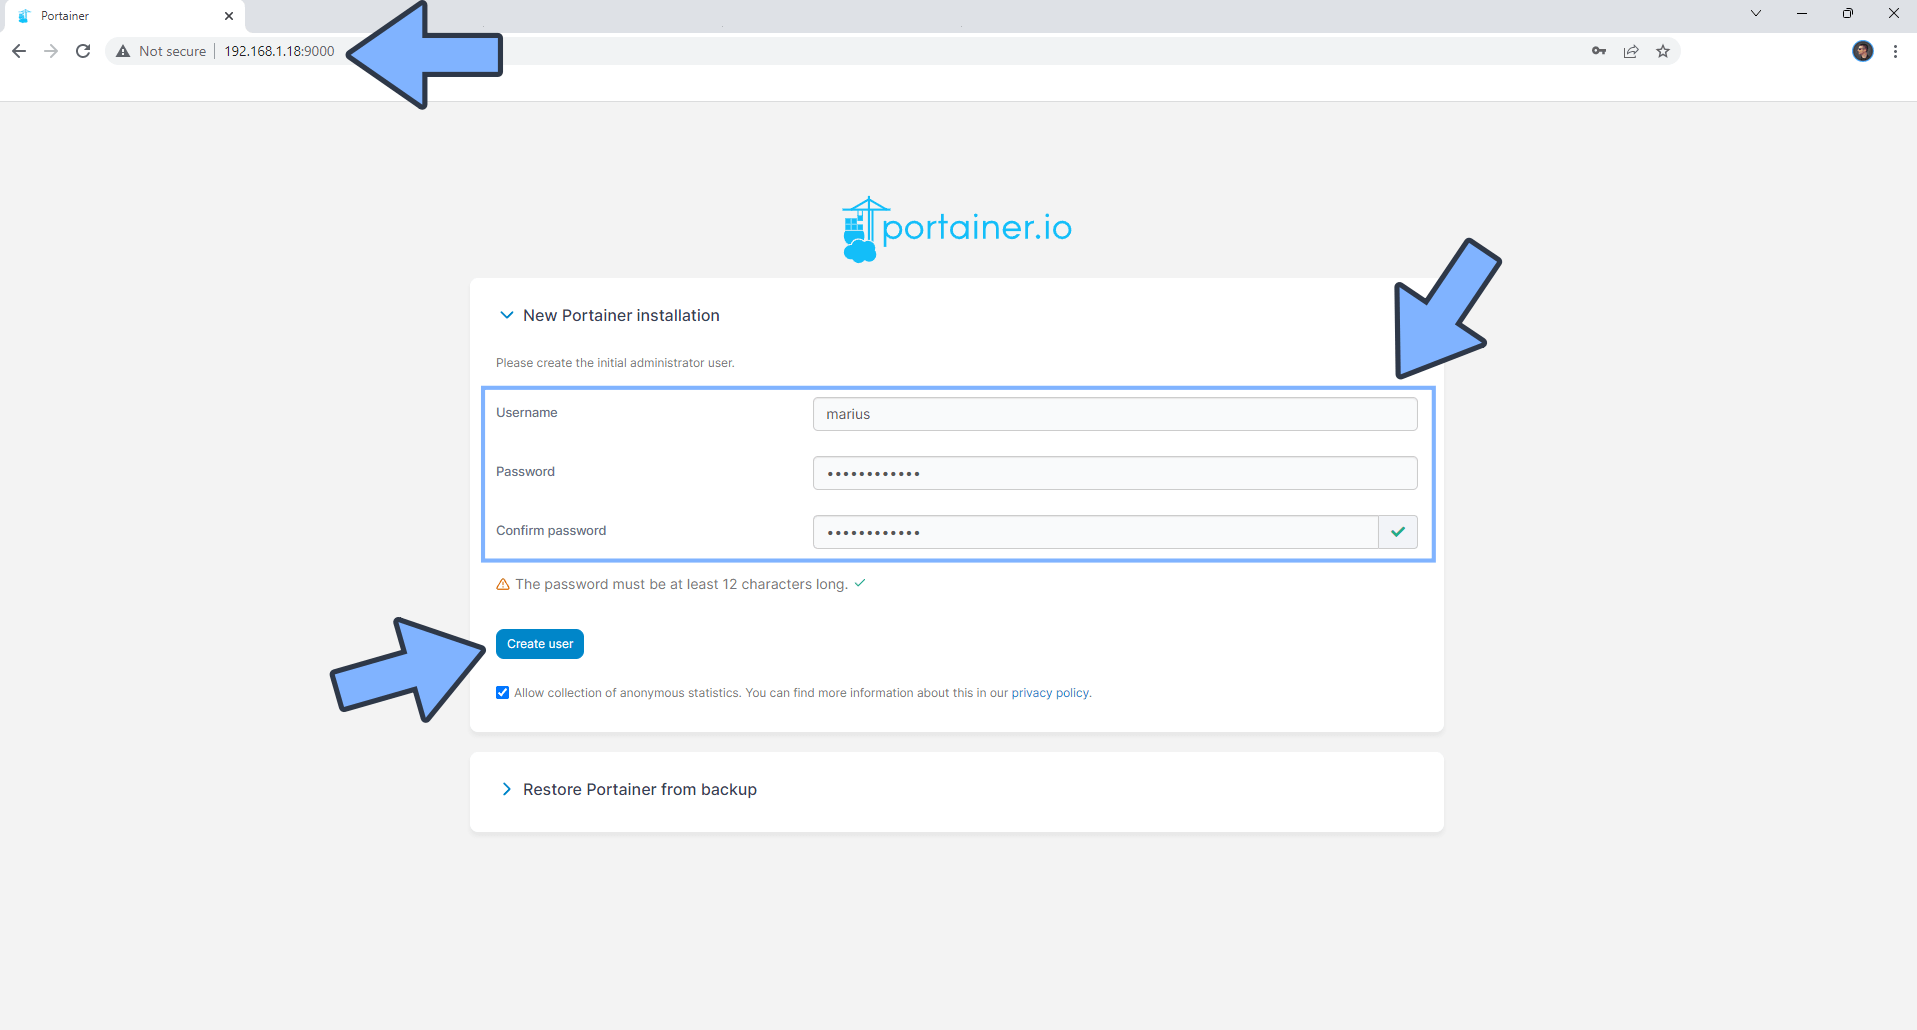
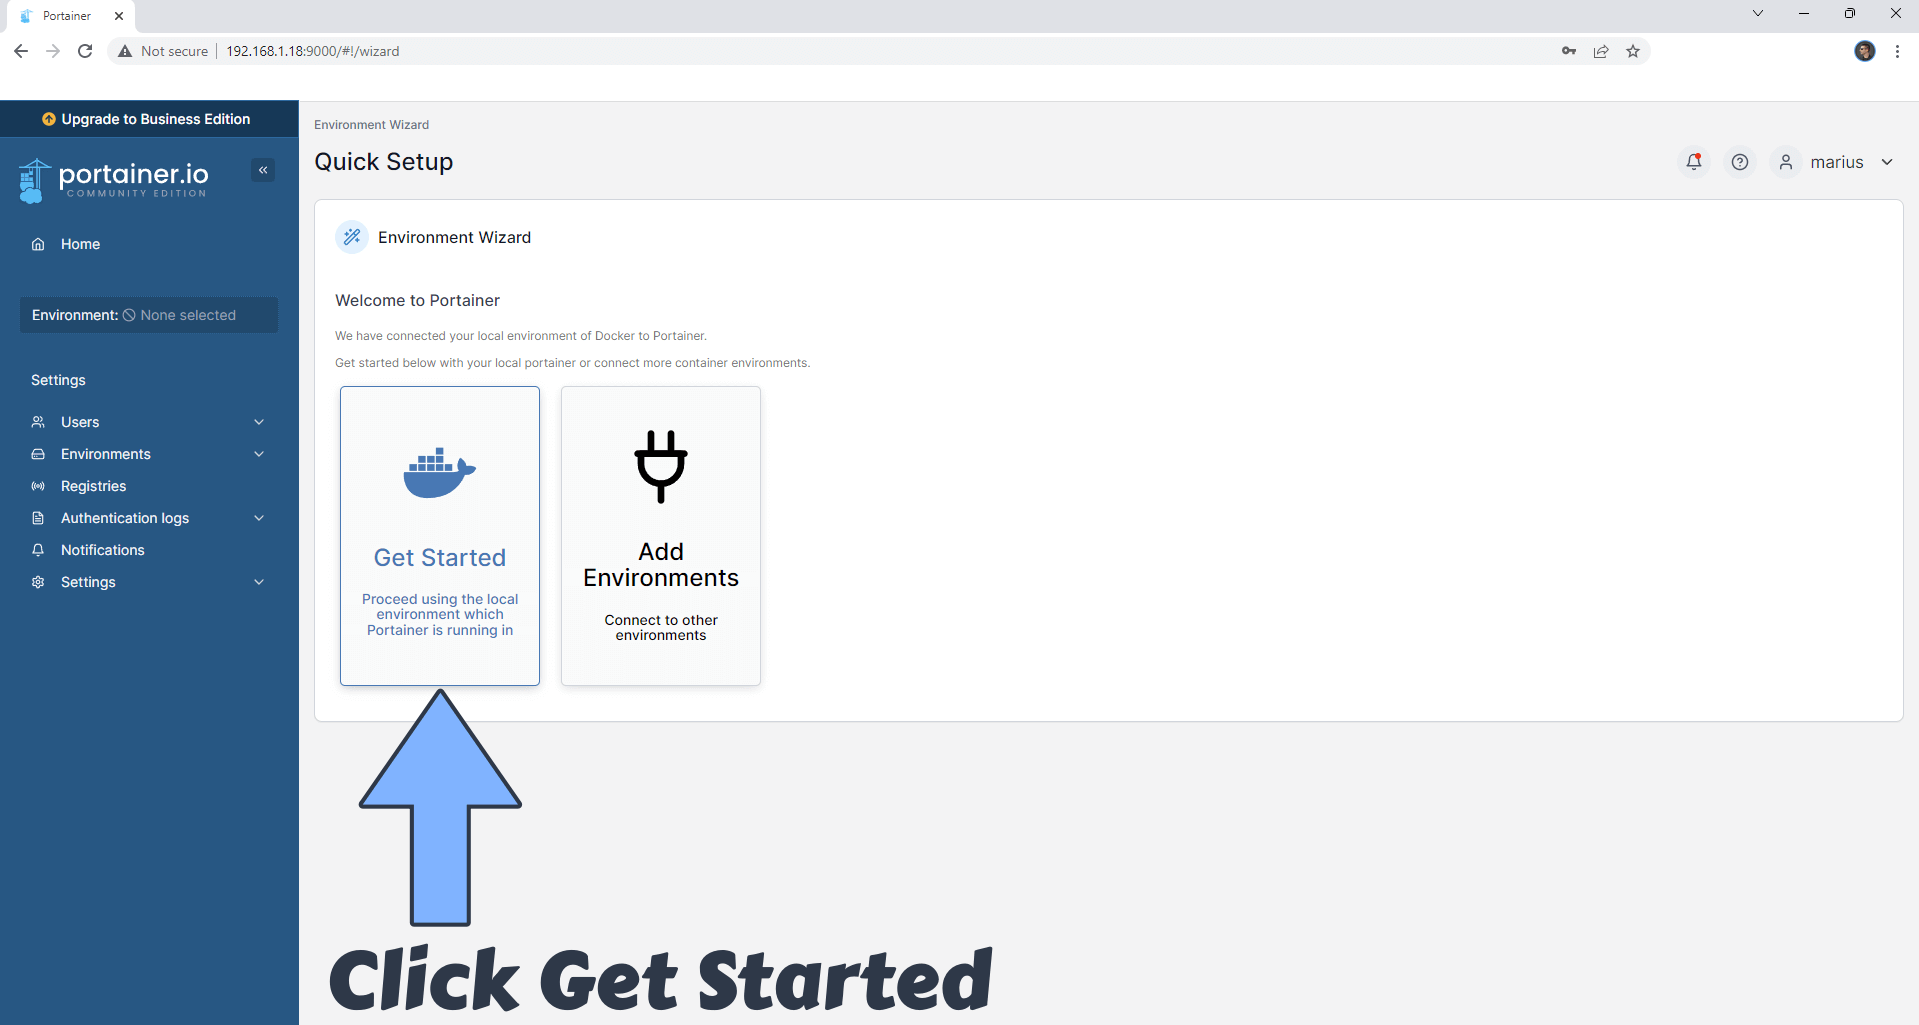
Open your browser and type in https://Synology-ip-address:9443 or http://Synology-ip-address:9000
Click Get Started
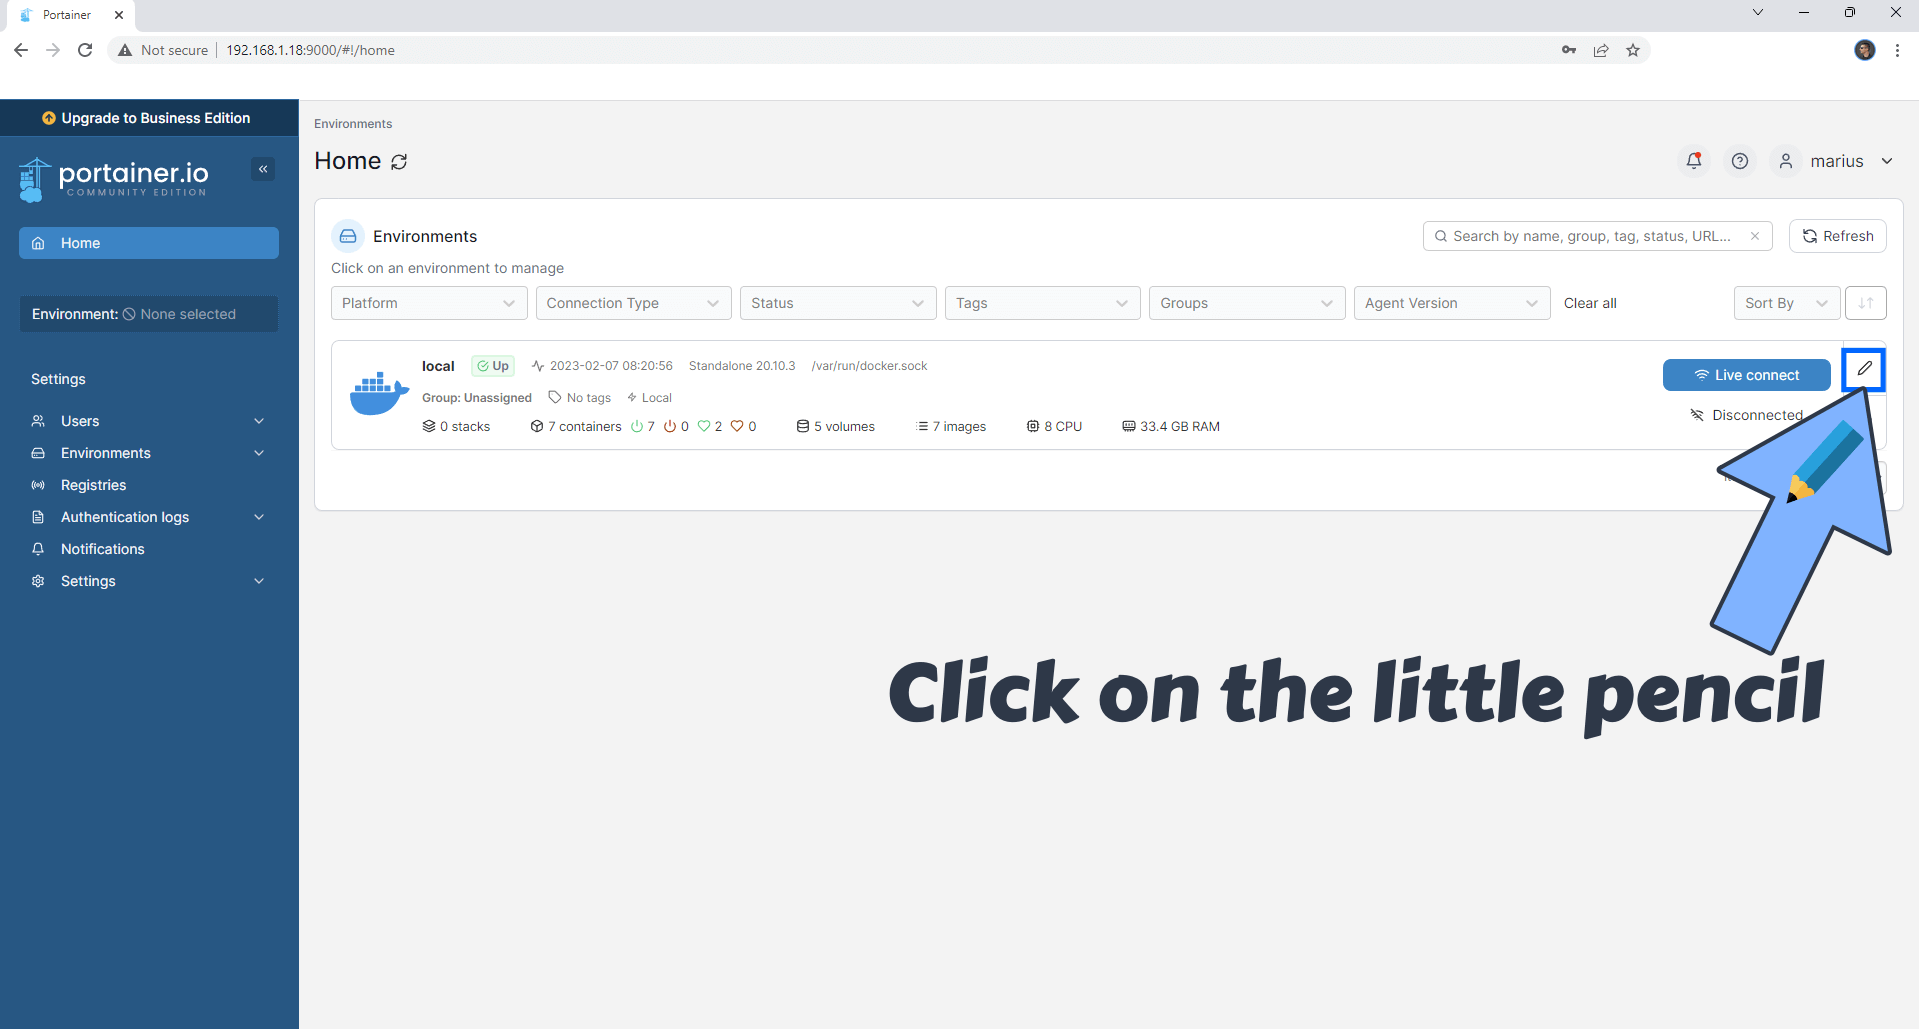
click on the little pencil
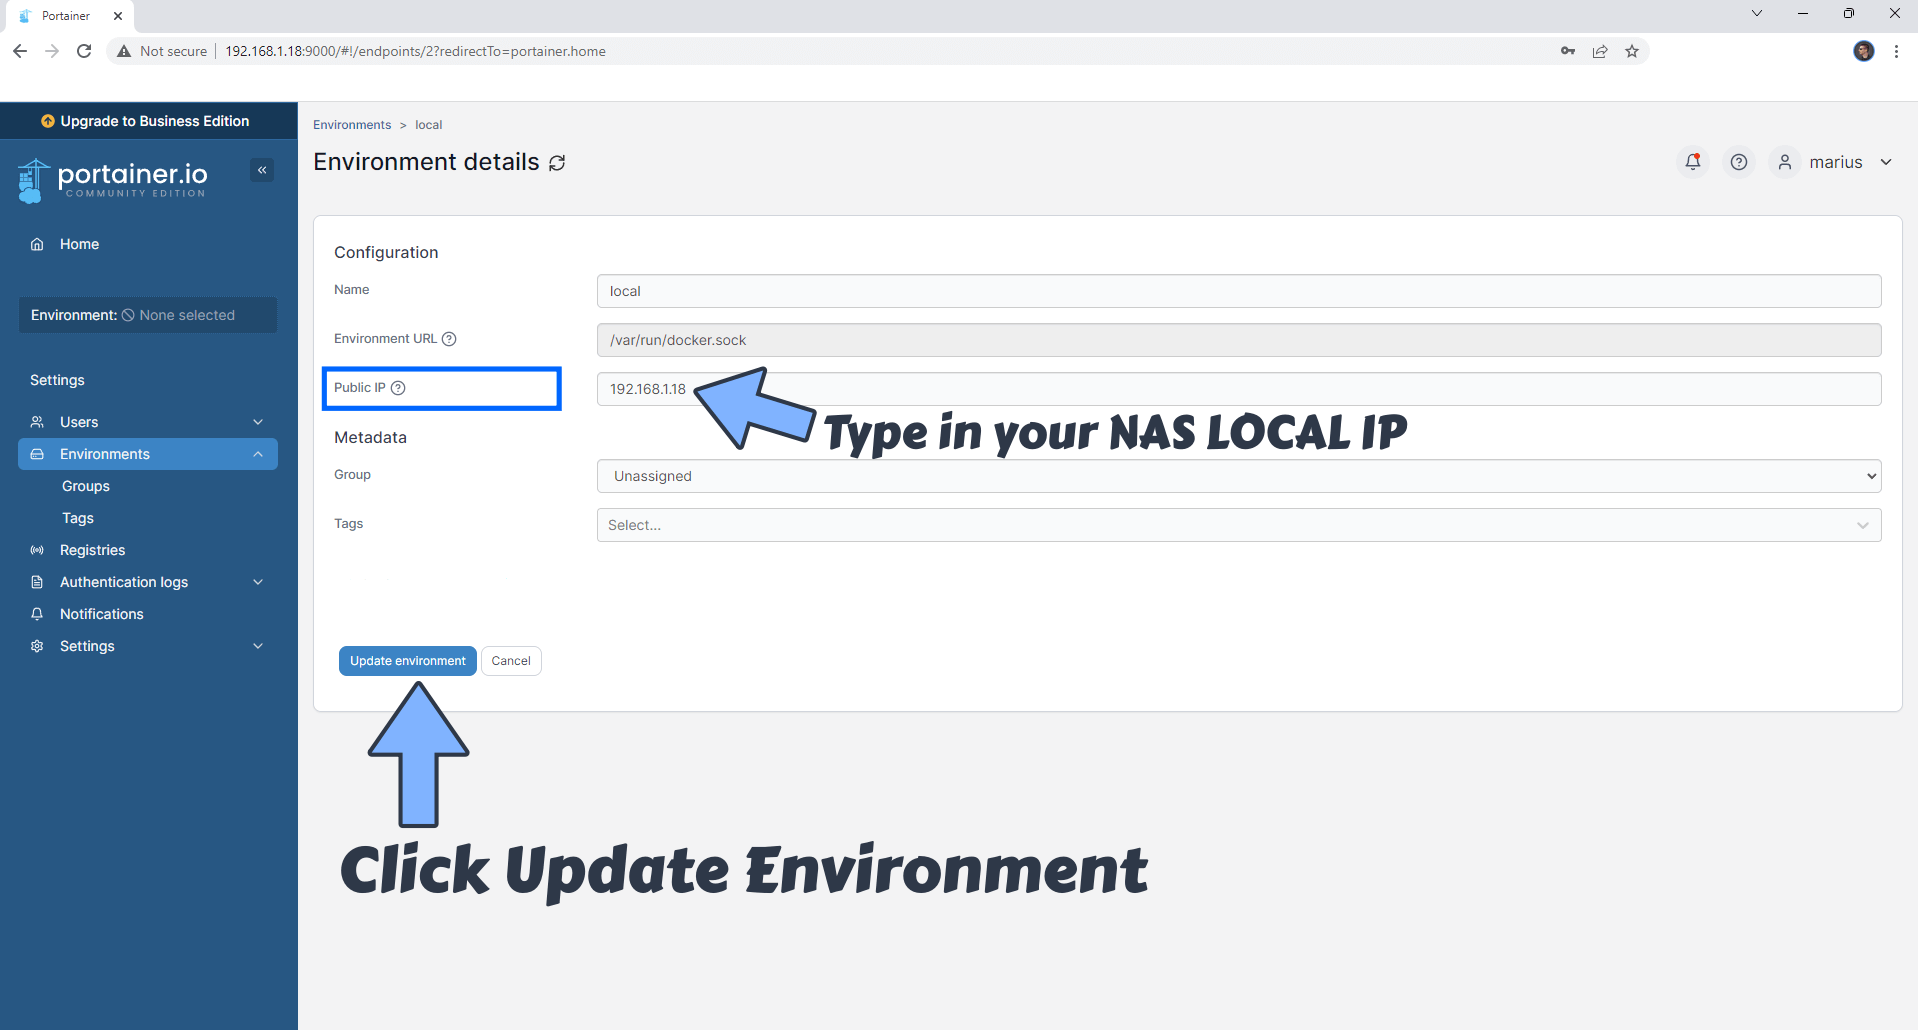
On the Public IP area type in your own NAS Local IP
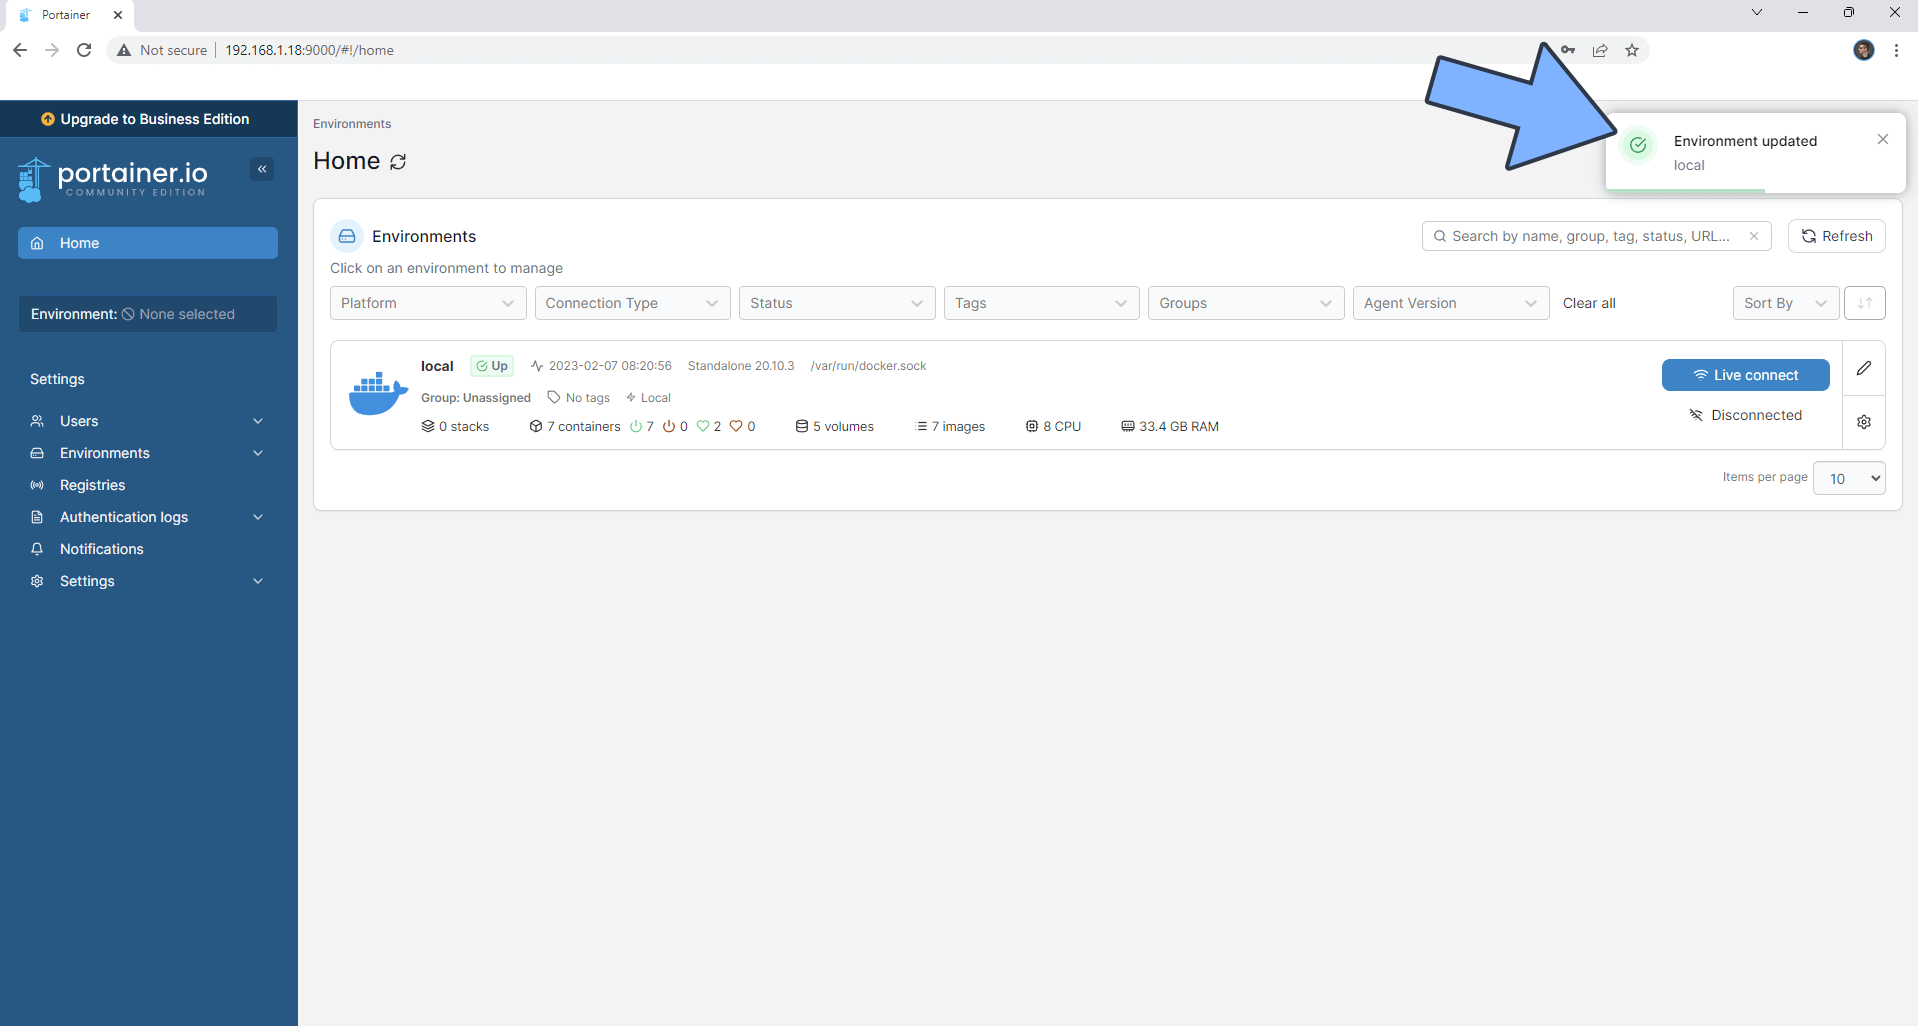
“Environment updated“
Dashboard is ready
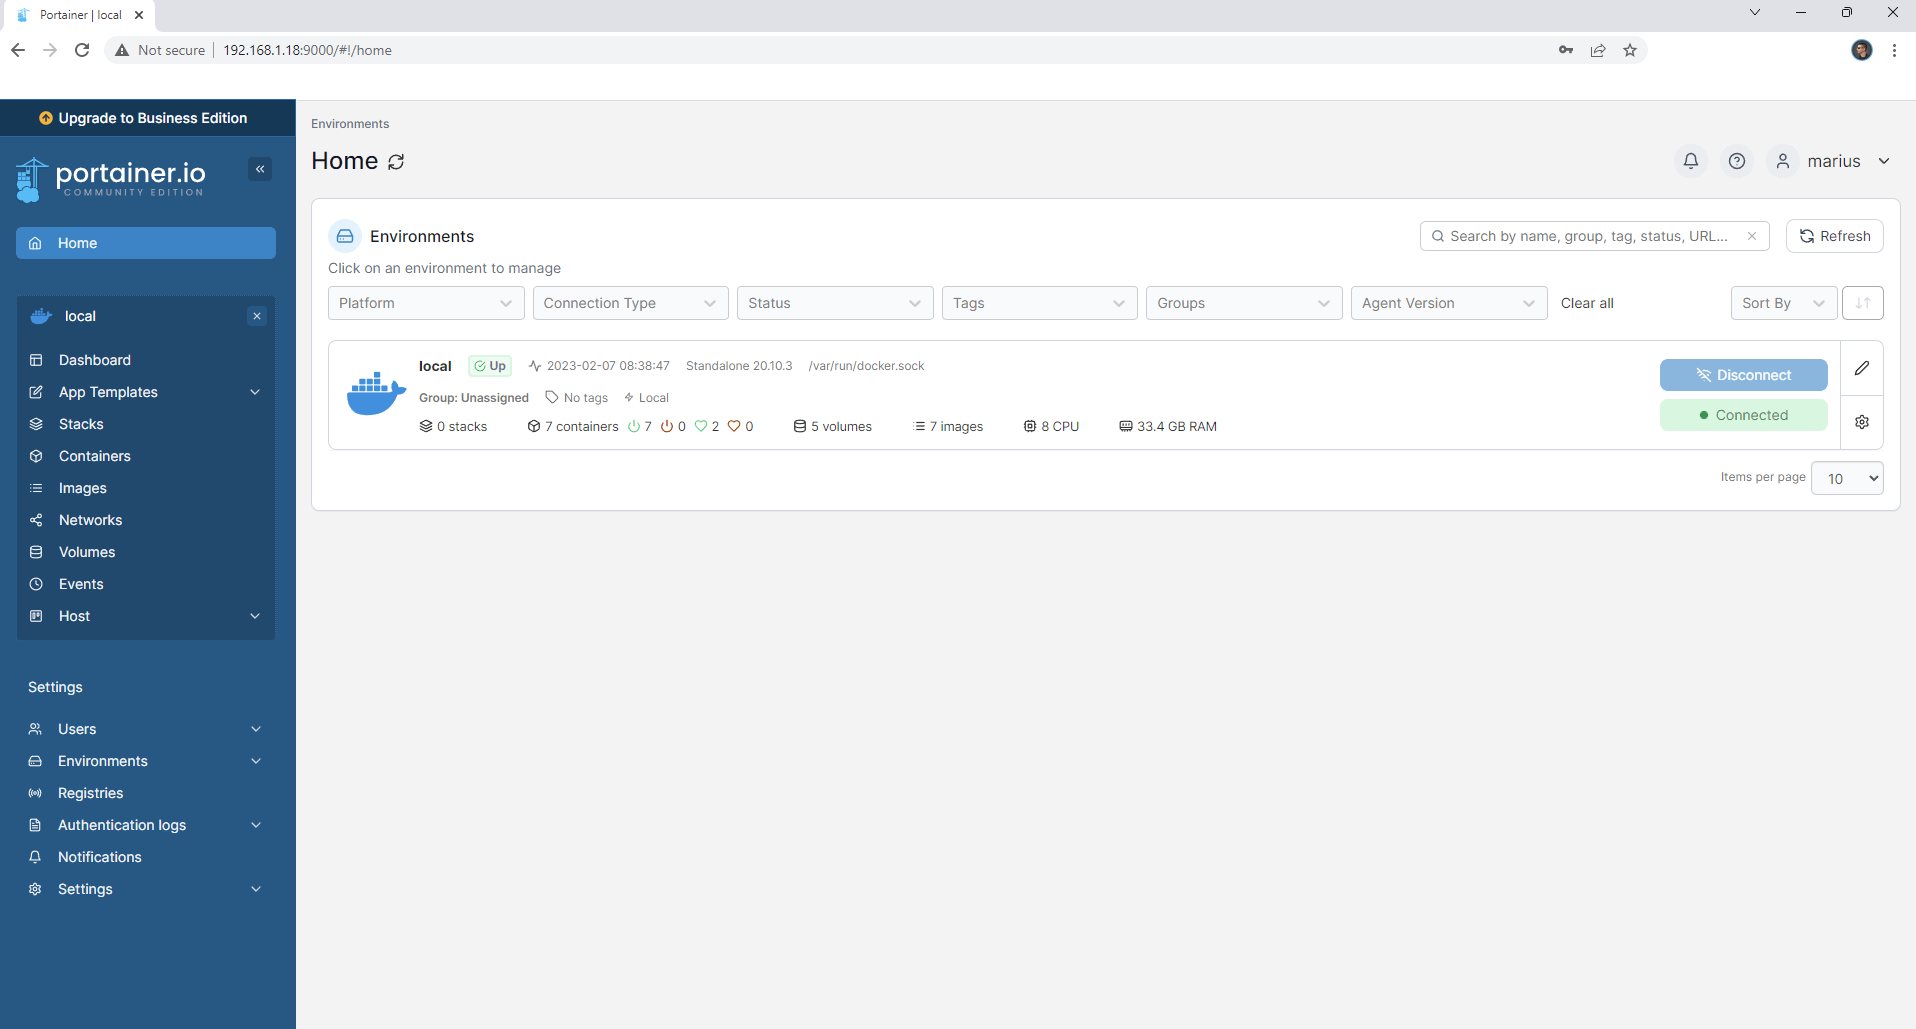
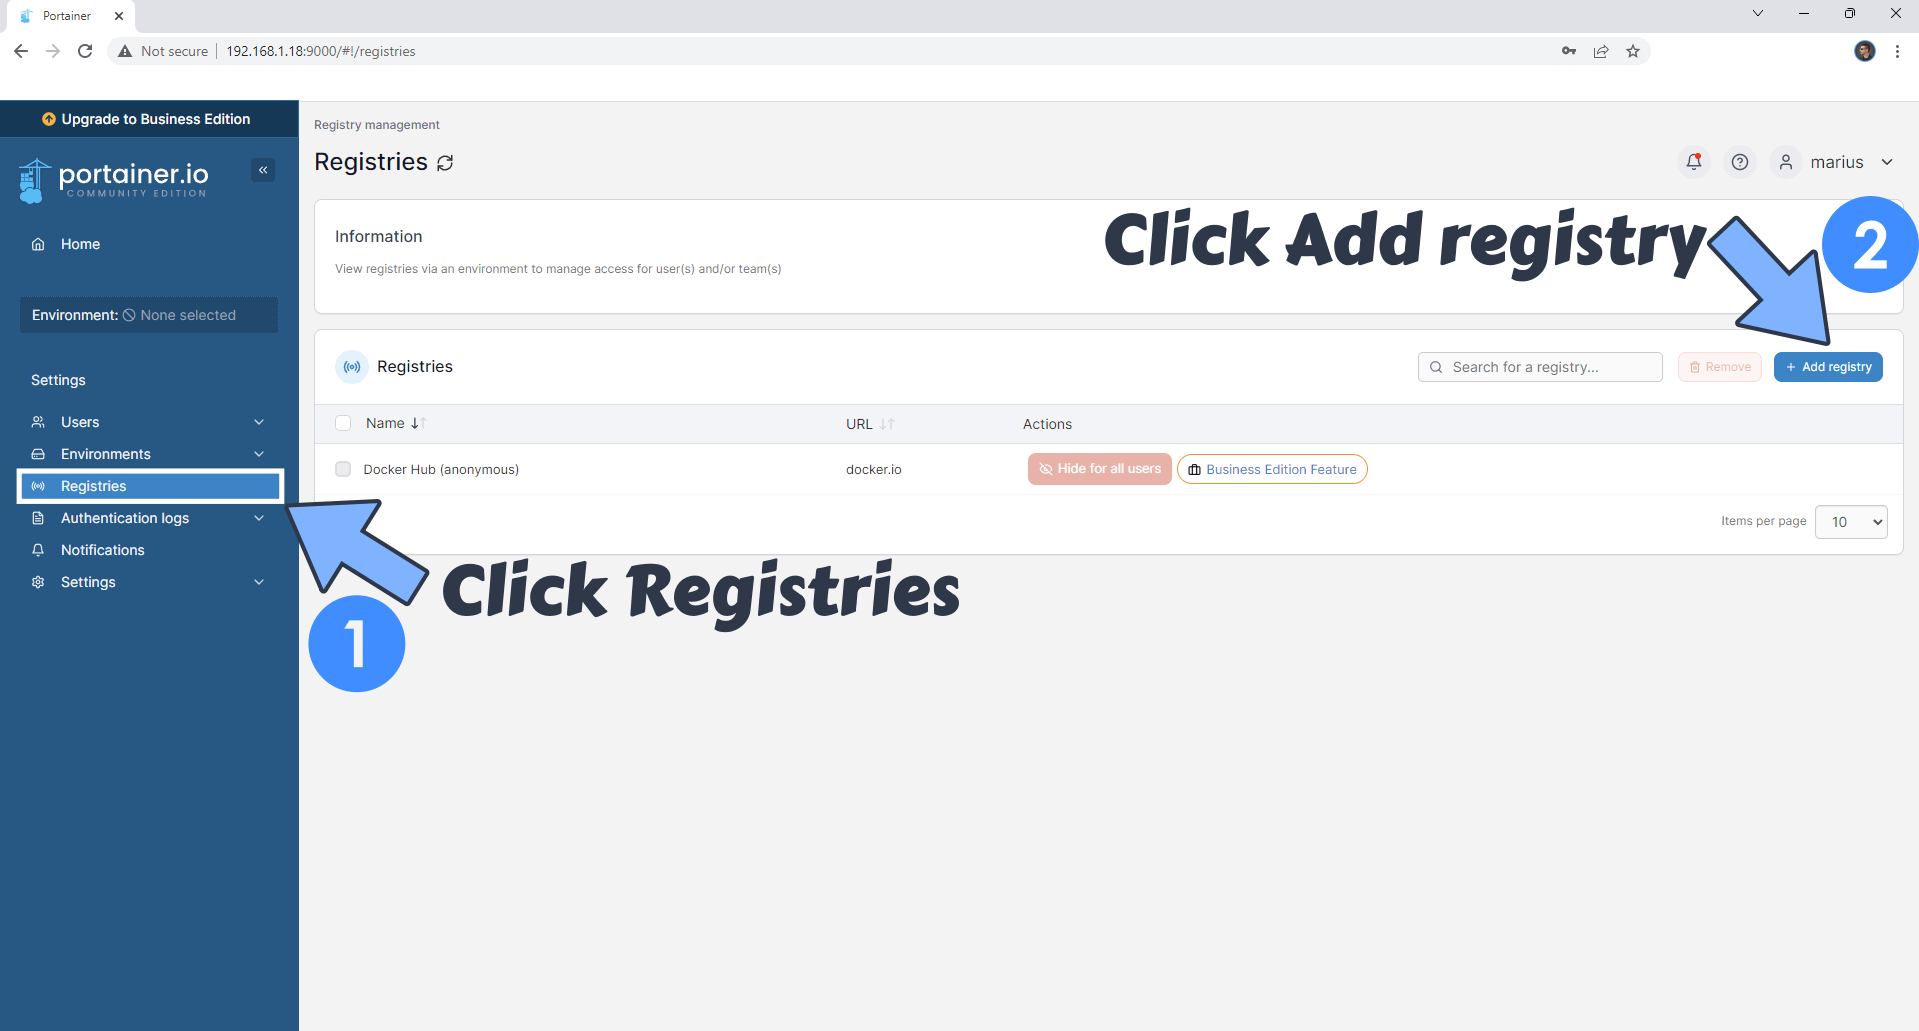
Adding Portainer registries
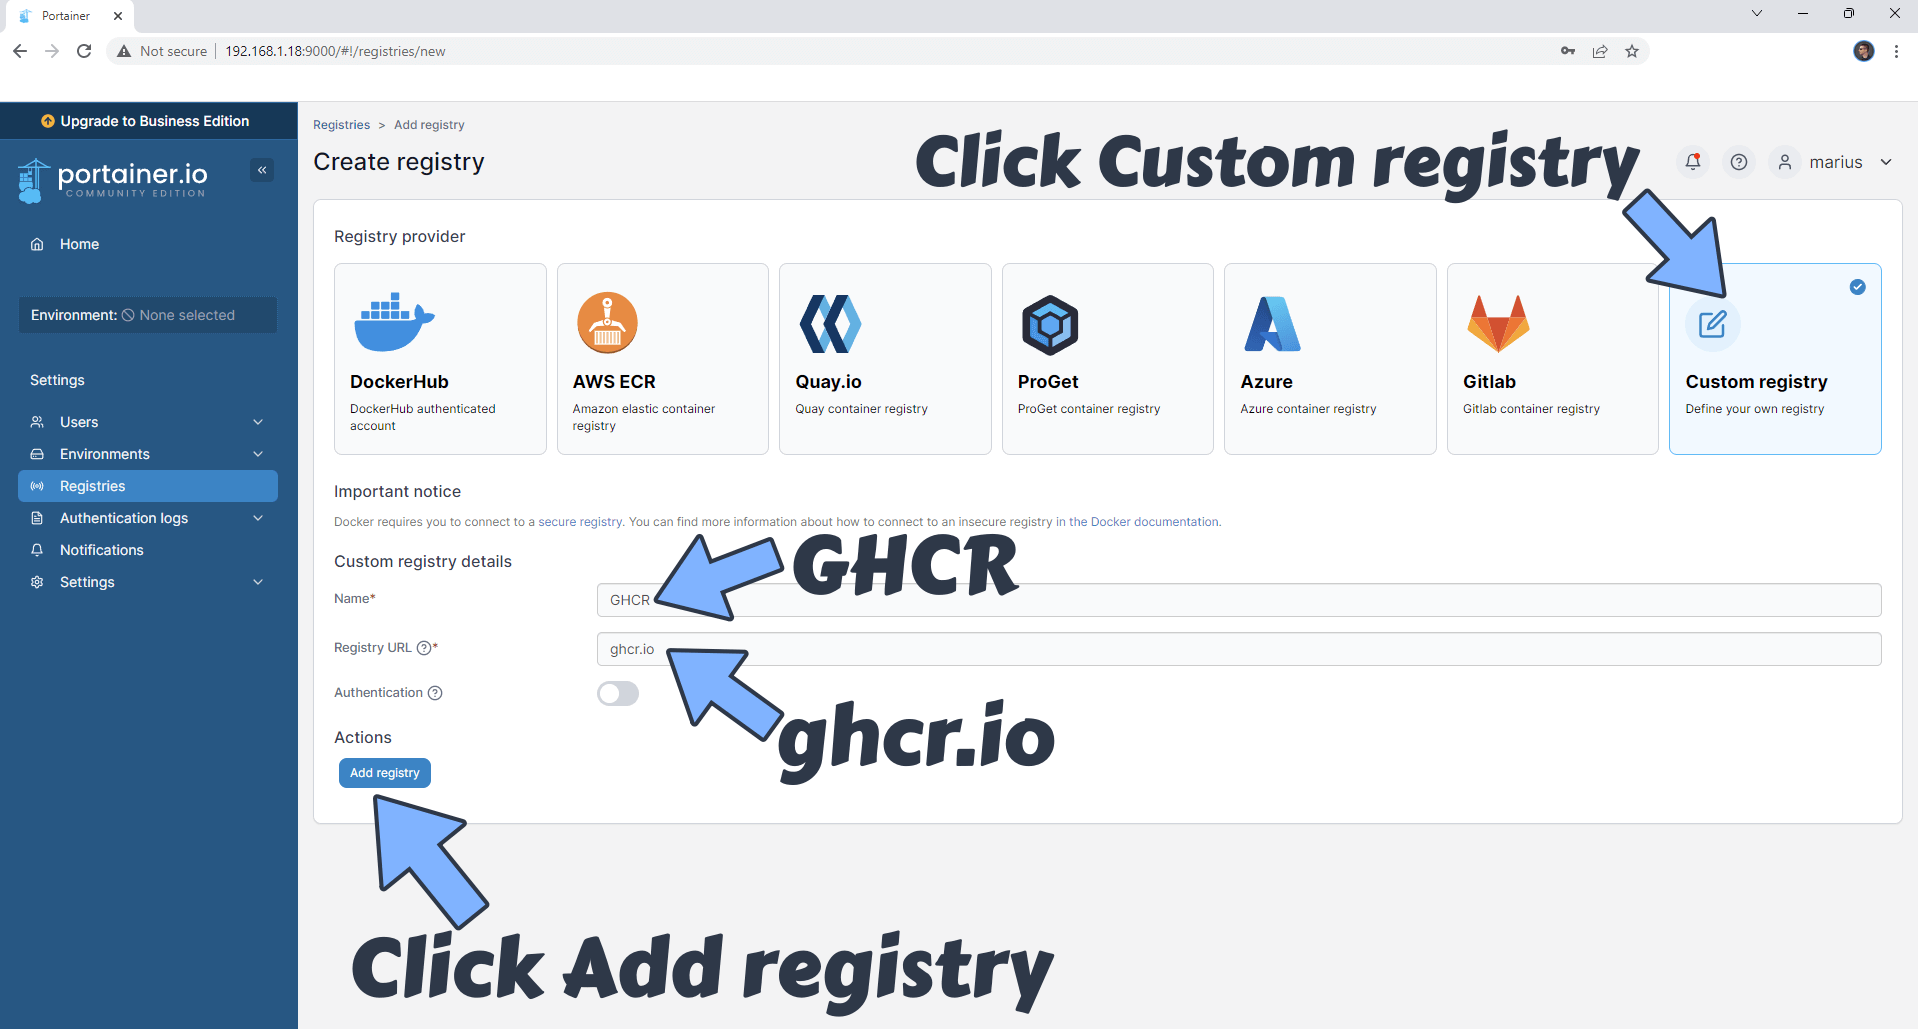
- Click on Custom registry. In the Name field area type in 'GHCR' and in the Registry URL area type in 'ghcr.io'
- Click Add registry
- Note: The 'ghcr.io' registry is mandatory if you want to update Docker containers via Portainer that are served via 'ghcr.io' registry.
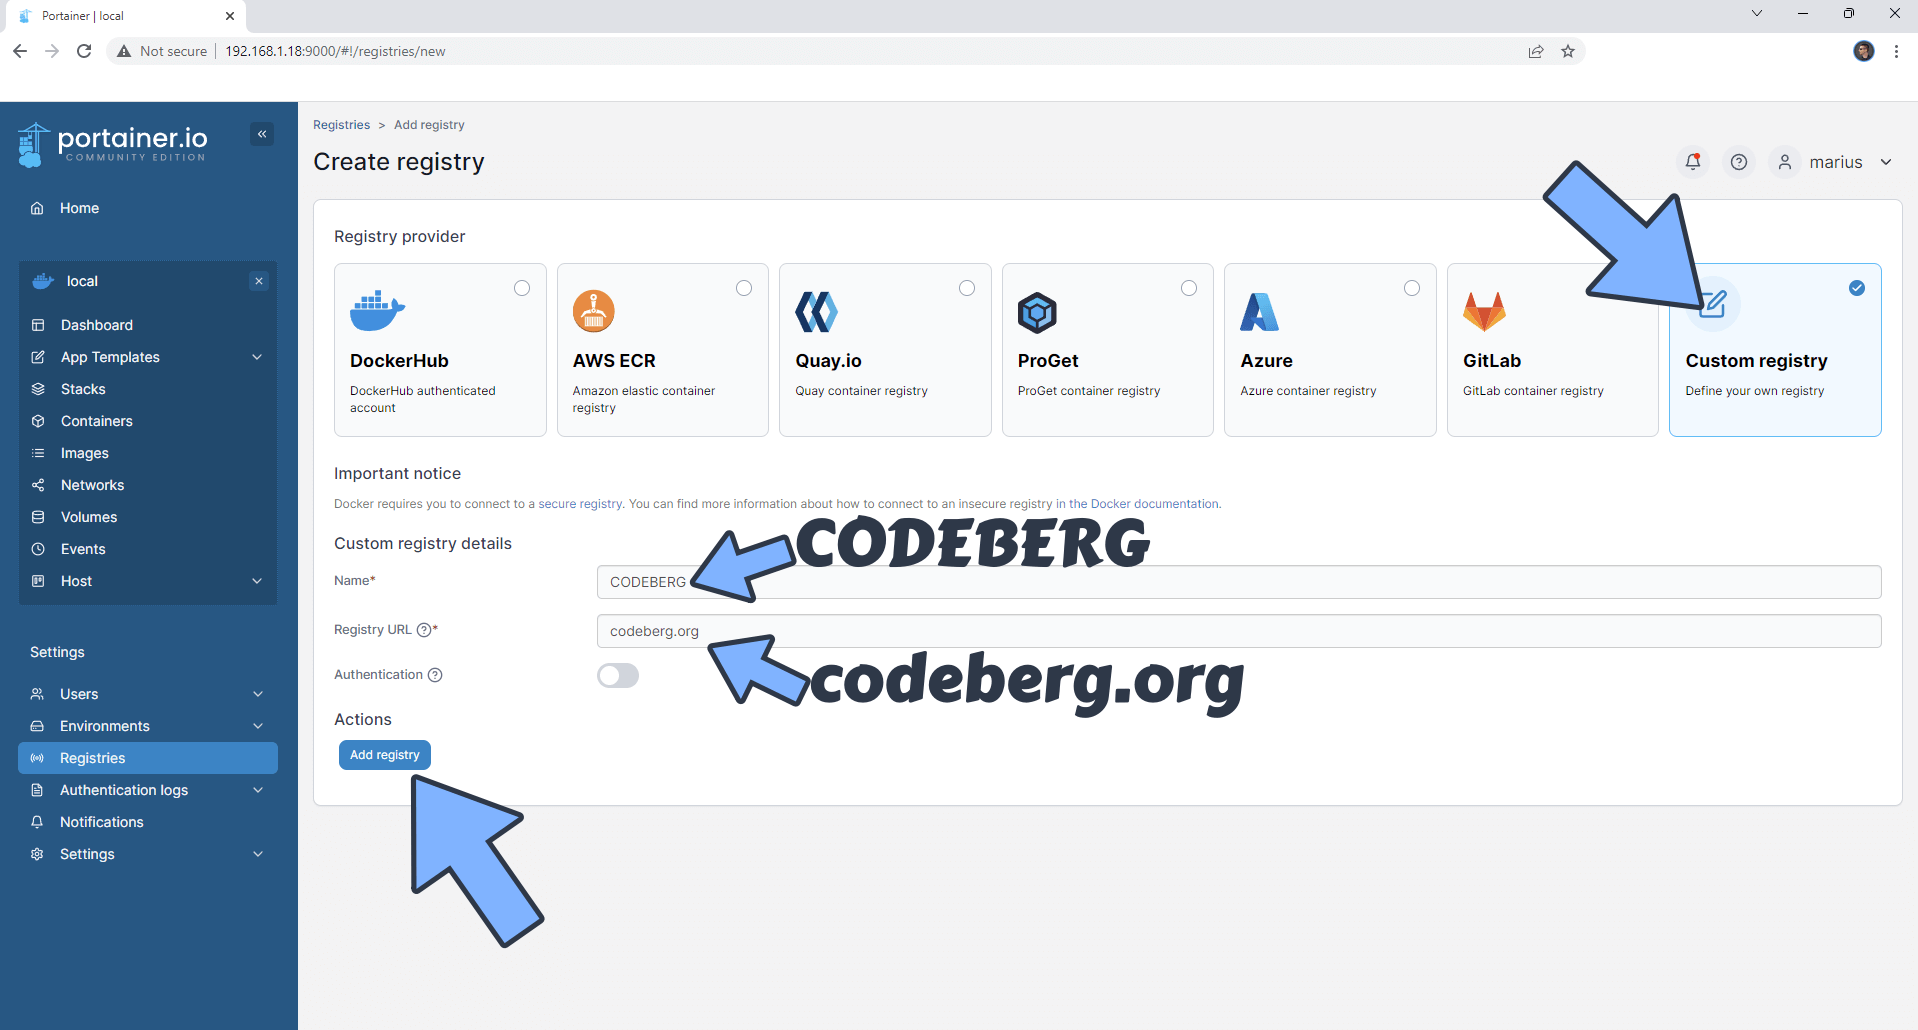
- Click on Custom registry. In the Name field area type in 'CODEBERG' and in the Registry URL area type in 'codeberg.org'
- Click Add registry
- Note: The 'codeberg.org' registry is mandatory if you want to update Docker containers via Portainer that are served via 'codeberg.org' registry.
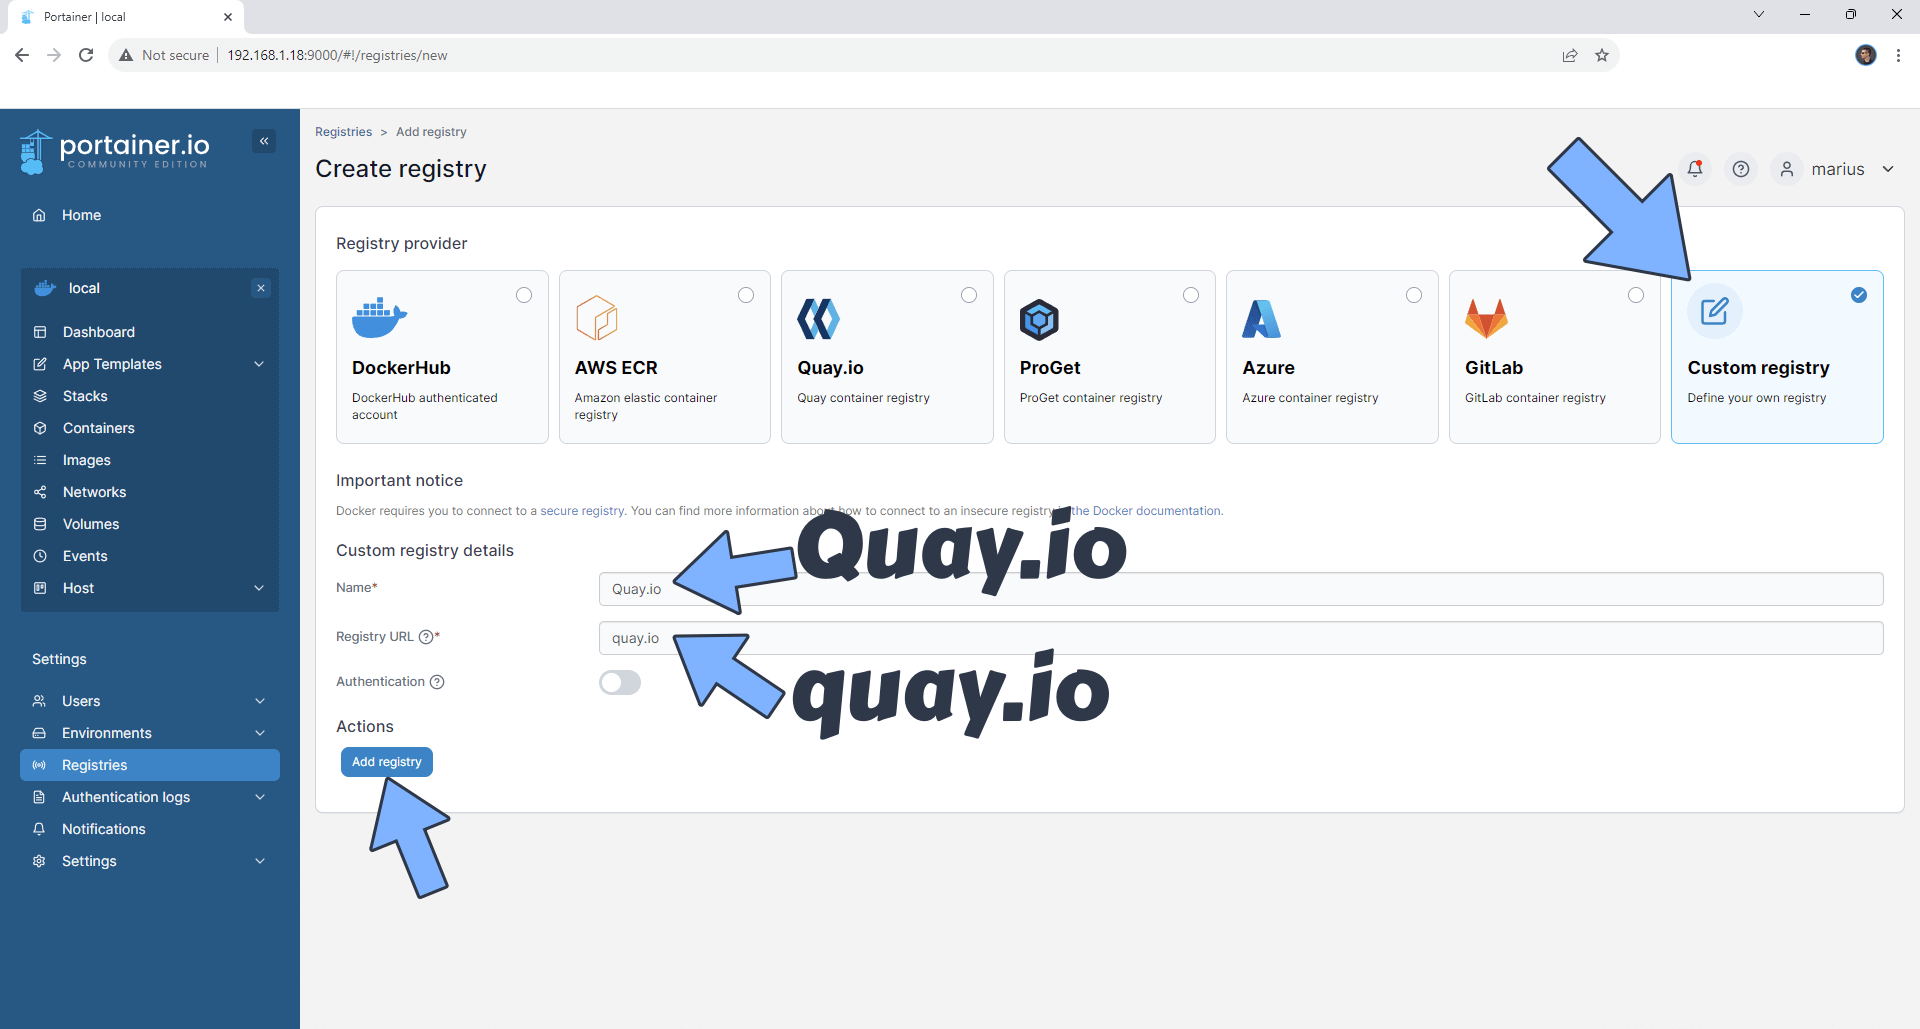
- Click on Custom registry. In the Name field area type in 'Quay.io' and in the Registry URL area type in 'quay.io'
- Click Add registry
- Note: 'The quay.io' registry is mandatory if you want to update Docker containers via Portainer that are served via 'quay.io' registry.
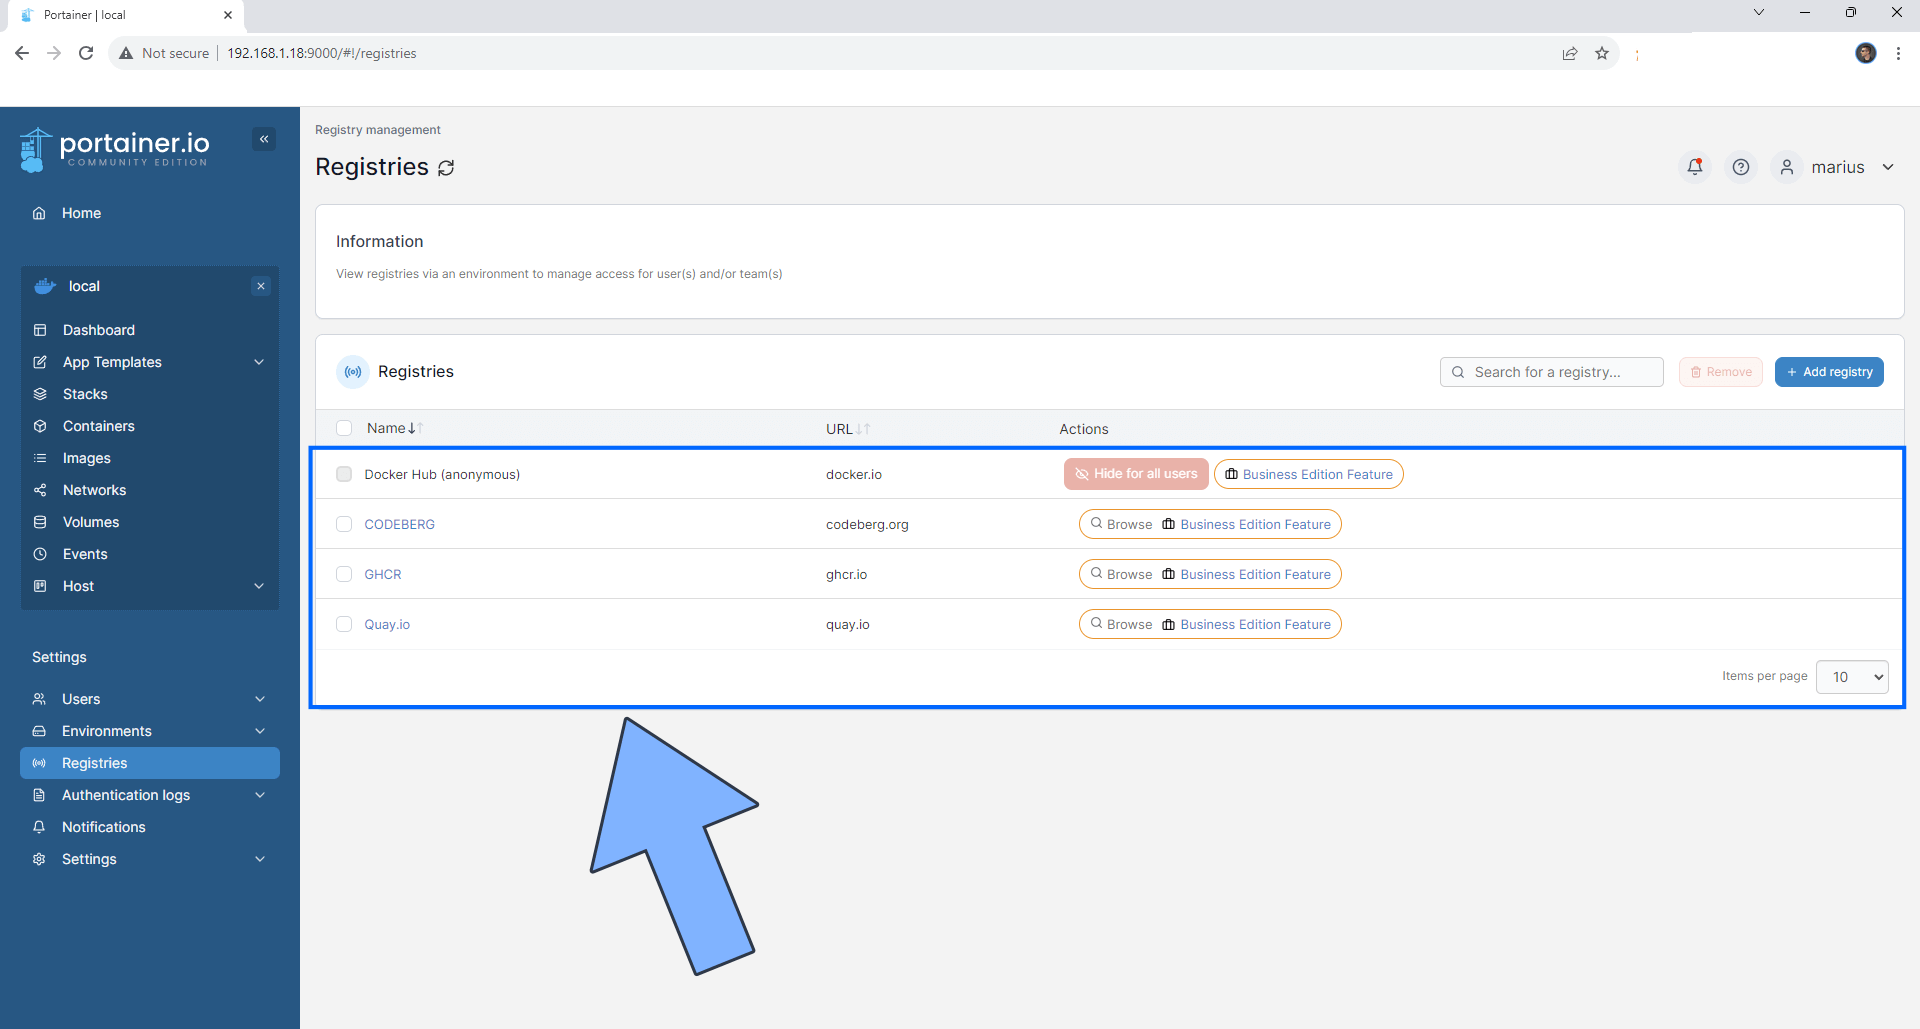
Your Registries area will look like this
Installing immich
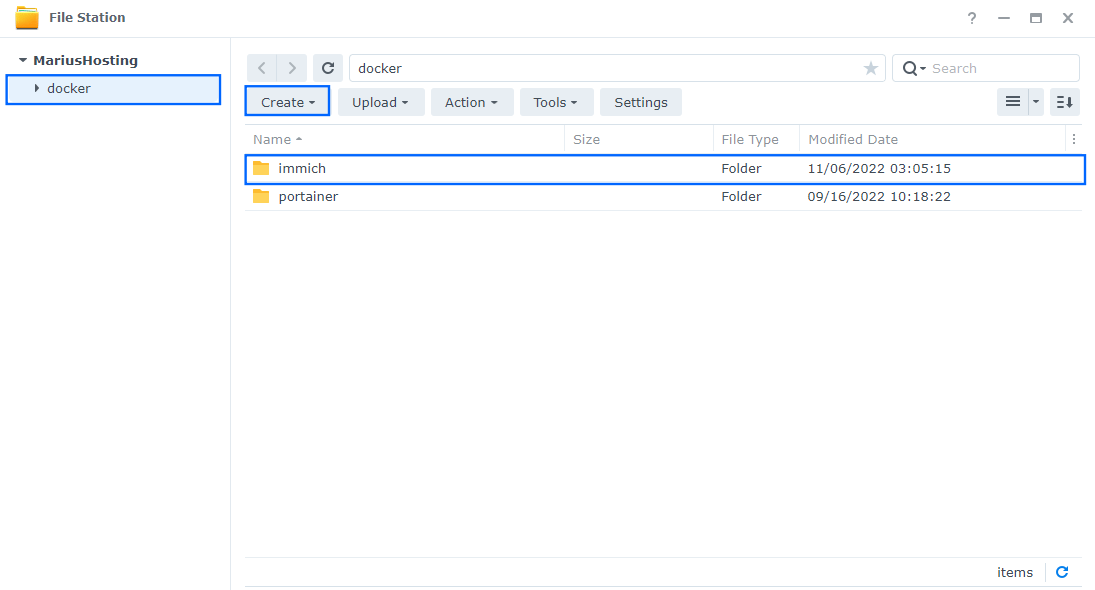
Go to File Station and open the docker folder. Inside the docker folder, create one new folder and name it immich.
Note: Be careful to enter only lowercase, not uppercase letters.
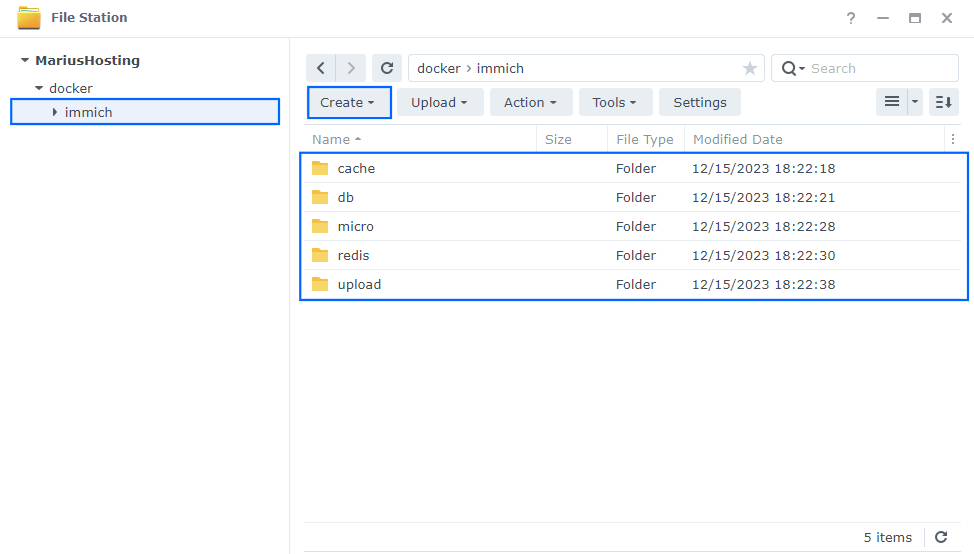
Now create five new folders inside the immich folder that you created at STEP 3 name them cache, db, micro, redis, upload.
Note: Be careful enter only lowercase, not uppercase letters.
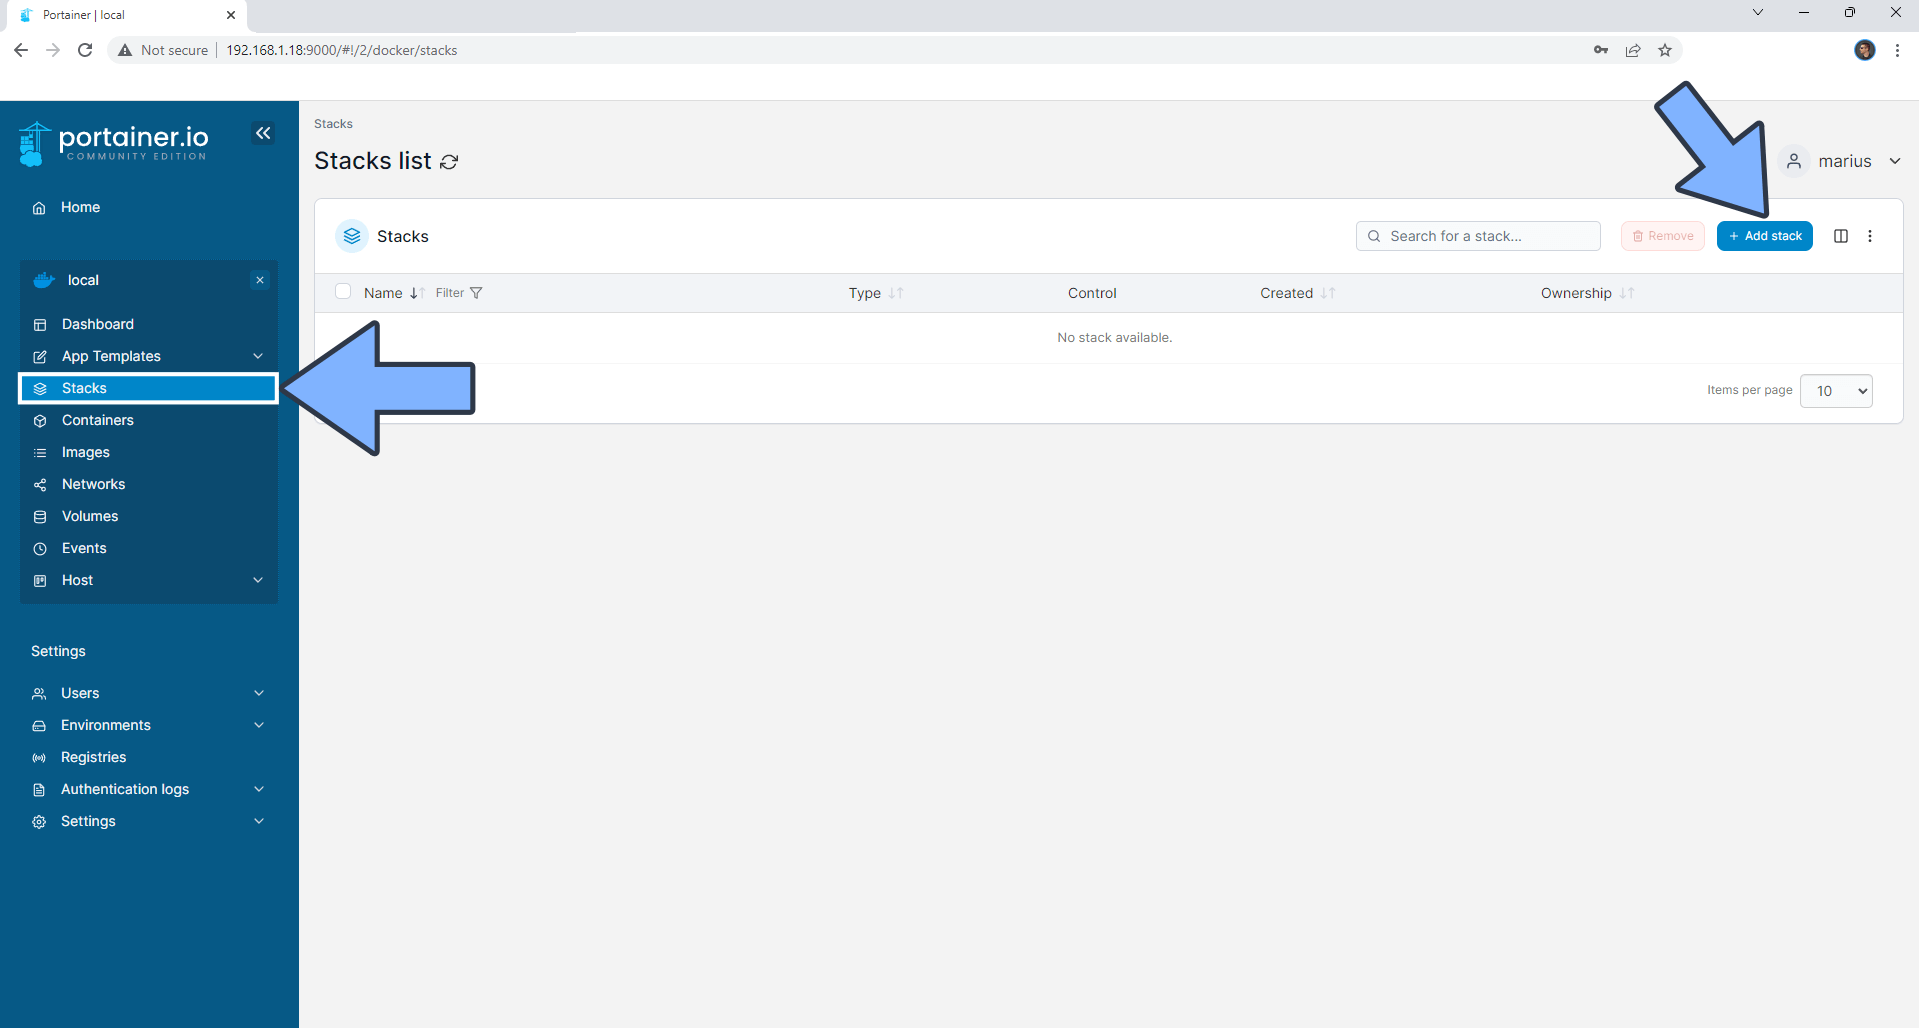
Log into Portainer using your username and password. On the left sidebar in Portainer, click on Stacks then + Add stack
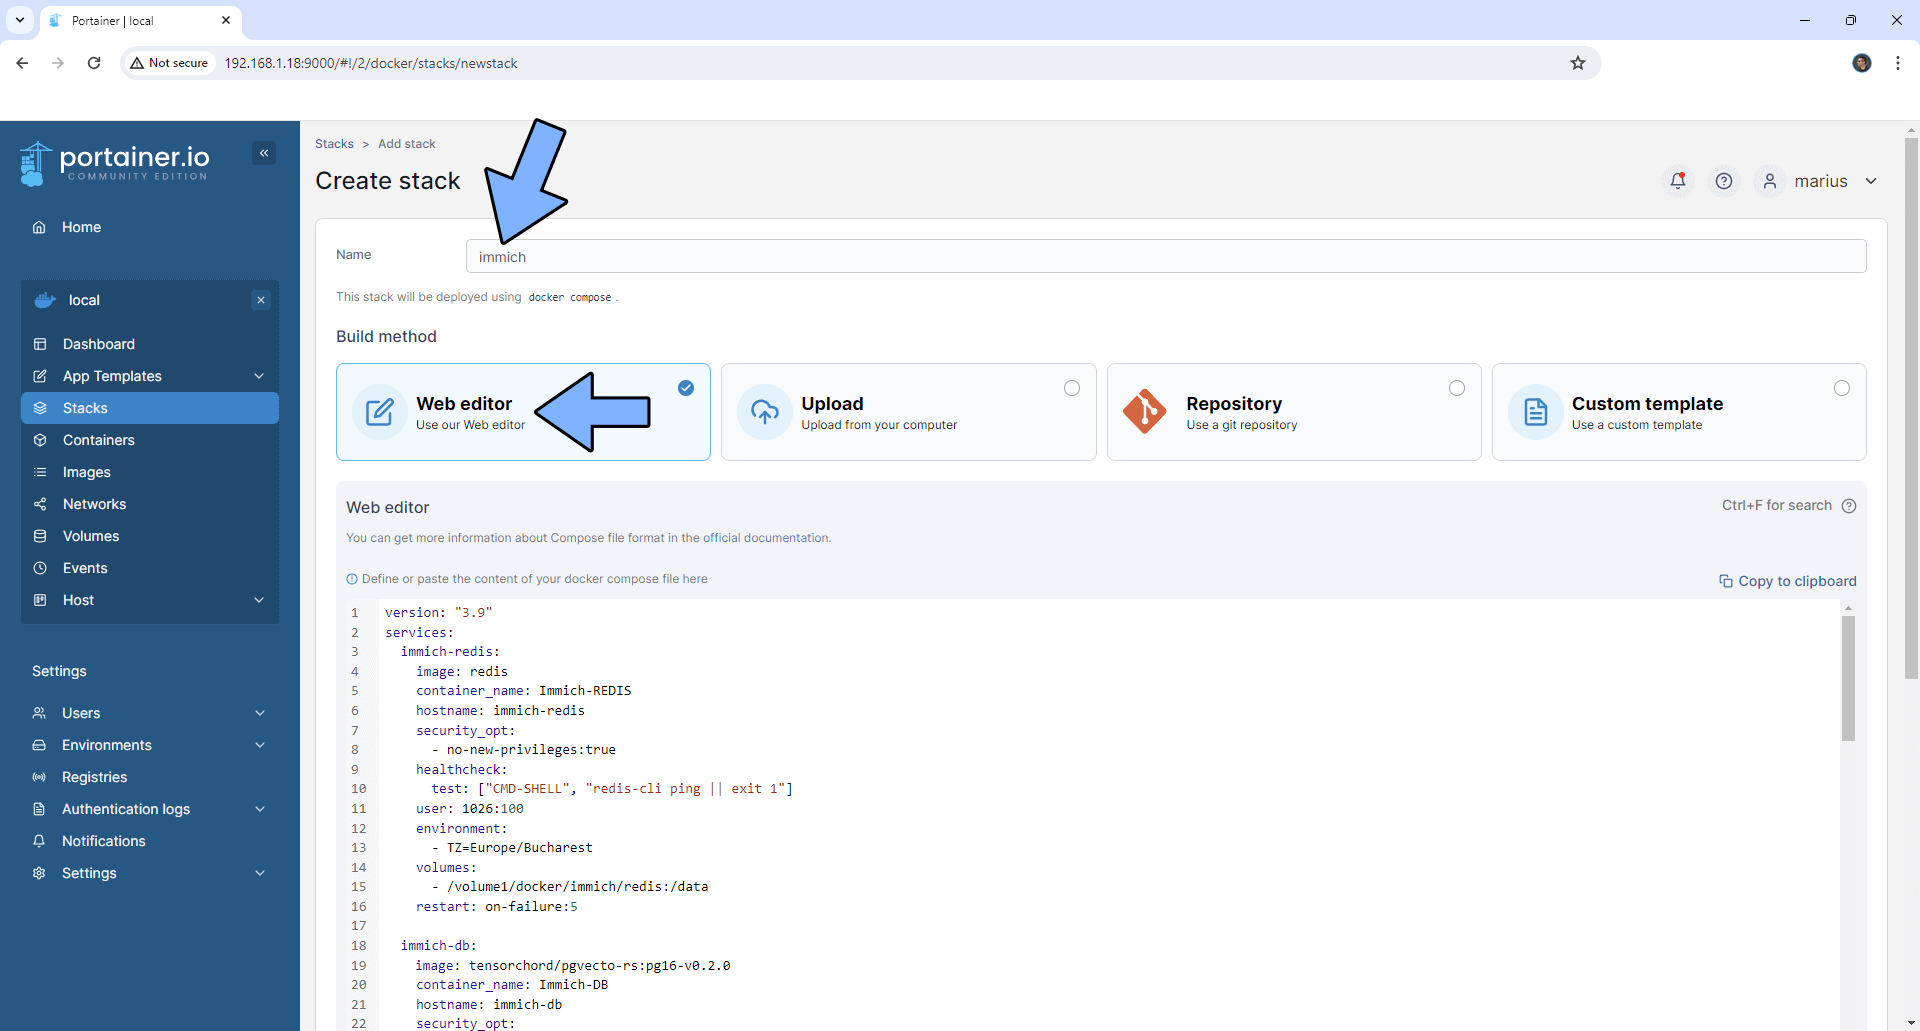
In the Name field type in immich
Paste the below in teh Web Editor Note: change the value numbers for user with your own UID and GID values.
name: immich

services:
immich-server:
    container_name: immich_server
    image: ghcr.io/immich-app/immich-server:${IMMICH_VERSION:-release}
    # extends:
    #   file: hwaccel.transcoding.yml
    #   service: cpu # set to one of [nvenc, quicksync, rkmpp, vaapi, vaapi-wsl] for accelerated transcoding
    volumes:
    # Do not edit the next line. If you want to change the media storage location on your system, edit the value of UPLOAD_LOCATION in the .env file
    - ${UPLOAD_LOCATION}
    - /etc/localtime:/etc/localtime:ro
    env_file:
    - stack.env
    ports:
    - 2283:3001
    depends_on:
    - redis
    - database
    restart: always

immich-machine-learning:
    container_name: immich_machine_learning
    # For hardware acceleration, add one of -[armnn, cuda, openvino] to the image tag.
    # Example tag: ${IMMICH_VERSION:-release}-cuda
    image: ghcr.io/immich-app/immich-machine-learning:${IMMICH_VERSION:-release}
    # extends: # uncomment this section for hardware acceleration - see https://immich.app/docs/features/ml-hardware-acceleration
    #   file: hwaccel.ml.yml
    #   service: cpu # set to one of [armnn, cuda, openvino, openvino-wsl] for accelerated inference - use the `-wsl` version for WSL2 where applicable
    volumes:
    - /volume25/docker/immich/upload:/usr/src/app/upload:rw
    - /volume25/docker/immich/cache:/cache:rw
    env_file:
    - stack.env
    restart: always

redis:
    container_name: immich_redis
    image: docker.io/redis:6.2-alpine@sha256:e3b17ba9479deec4b7d1eeec1548a253acc5374d68d3b27937fcfe4df8d18c7e
    healthcheck:
    test: redis-cli ping || exit 1
    restart: always

database:
    container_name: immich_postgres
    image: tensorchord/pgvecto-rs:pg16-v0.2.0
    environment:
    POSTGRES_PASSWORD: ${DB_PASSWORD}
    POSTGRES_USER: ${DB_USERNAME}
    POSTGRES_DB: ${DB_DATABASE_NAME}
    POSTGRES_INITDB_ARGS: '--data-checksums'
    volumes:
    # Do not edit the next line. If you want to change the database storage location on your system, edit the value of DB_DATA_LOCATION in the .env file
    - ${DB_DATA_LOCATION}
    healthcheck:
    test: pg_isready --dbname='${DB_DATABASE_NAME}' --username='${DB_USERNAME}' || exit 1; Chksum="$$(psql --dbname='${DB_DATABASE_NAME}' --username='${DB_USERNAME}' --tuples-only --no-align --command='SELECT COALESCE(SUM(checksum_failures), 0) FROM pg_stat_database')"; echo "checksum failure count is $$Chksum"; [ "$$Chksum" = '0' ] || exit 1
    interval: 5m
    start_interval: 30s
    start_period: 5m
    command: ["postgres", "-c" ,"shared_preload_libraries=vectors.so", "-c", 'search_path="$$user", public, vectors', "-c", "logging_collector=on", "-c", "max_wal_size=2GB", "-c", "shared_buffers=512MB", "-c", "wal_compression=on"]
    restart: always

volumes:
model-cache:
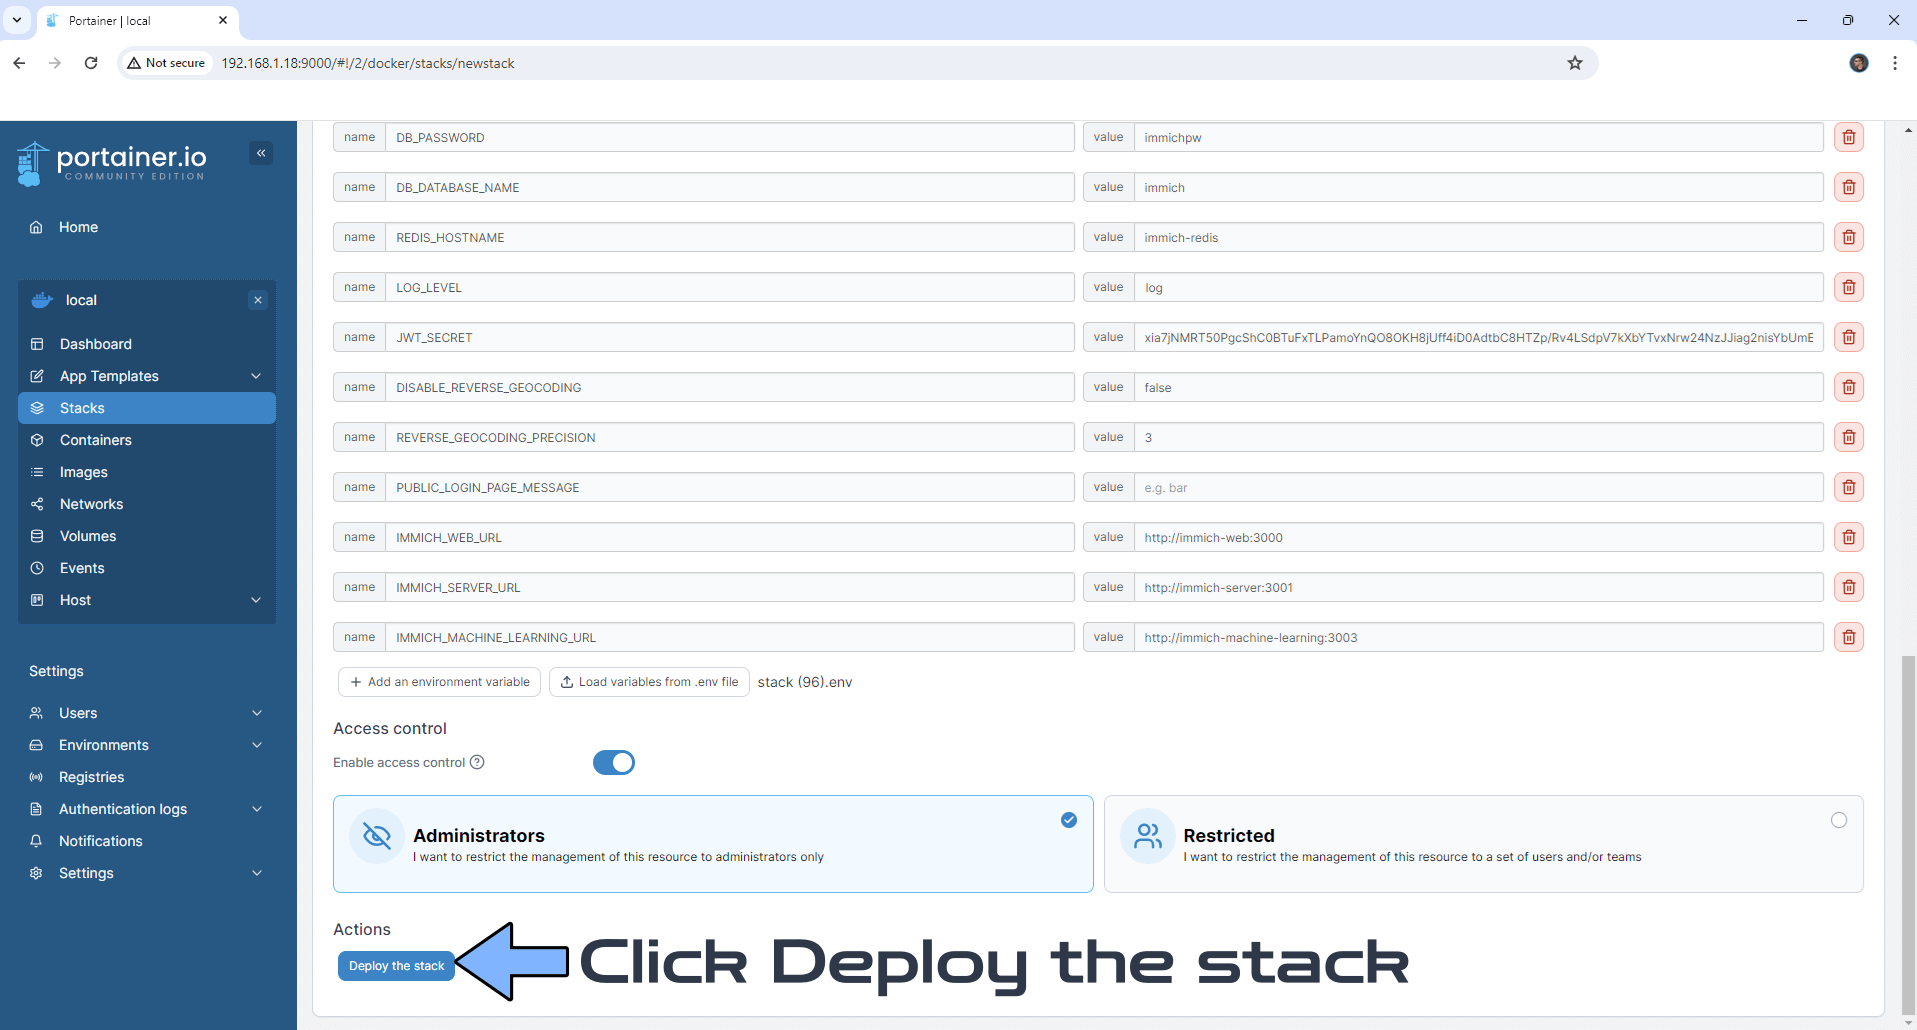
Scroll down to the env and click on advanced and paste the below, then click on simple.
.env file
UPLOAD_LOCATION=/volume25/docker/immich/redis:/data:rw
IMMICH_VERSION=release
DB_PASSWORD=xxxxxx
JWT_SECRET=xxxxxx

# The values below this line do not need to be changed
######################################################
DB_HOSTNAME=immich
DB_USERNAME=xxxxxx
DB_DATABASE_NAME=xxxxxx
DB_DATA_LOCATION=/volume1/docker/immich/db:/var/lib/postgresql/data:rw
REDIS_HOSTNAME=redis
IMMICH_WEB_URL=http://10.10.10.31:3000
IMMICH_SERVER_URL=http://10.10.10.31:3001
DISABLE_REVERSE_GEOCODING=false
REVERSE_GEOCODING_PERCISION=3
LOG_LEVEL=log
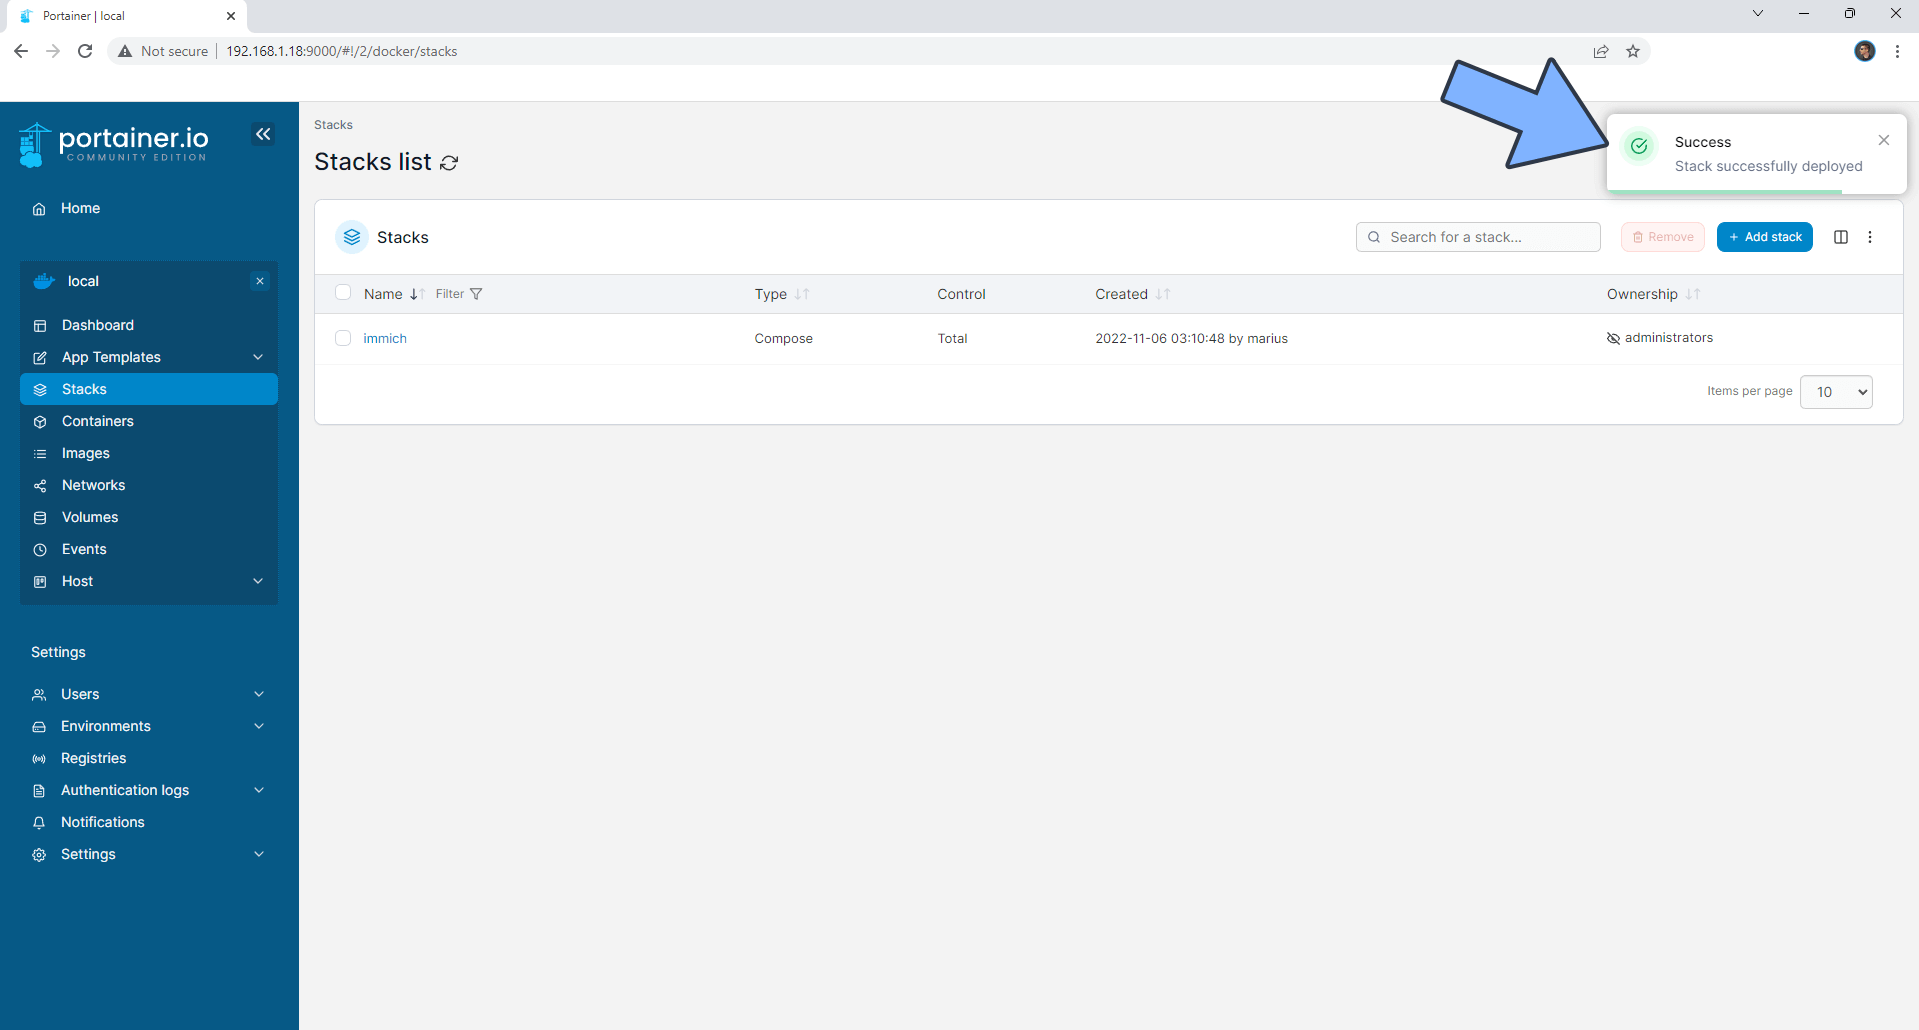
Click Deploy the stack, wait 5 minutes before attempting to access immich. This could take longer if you have a slower Internet connection.
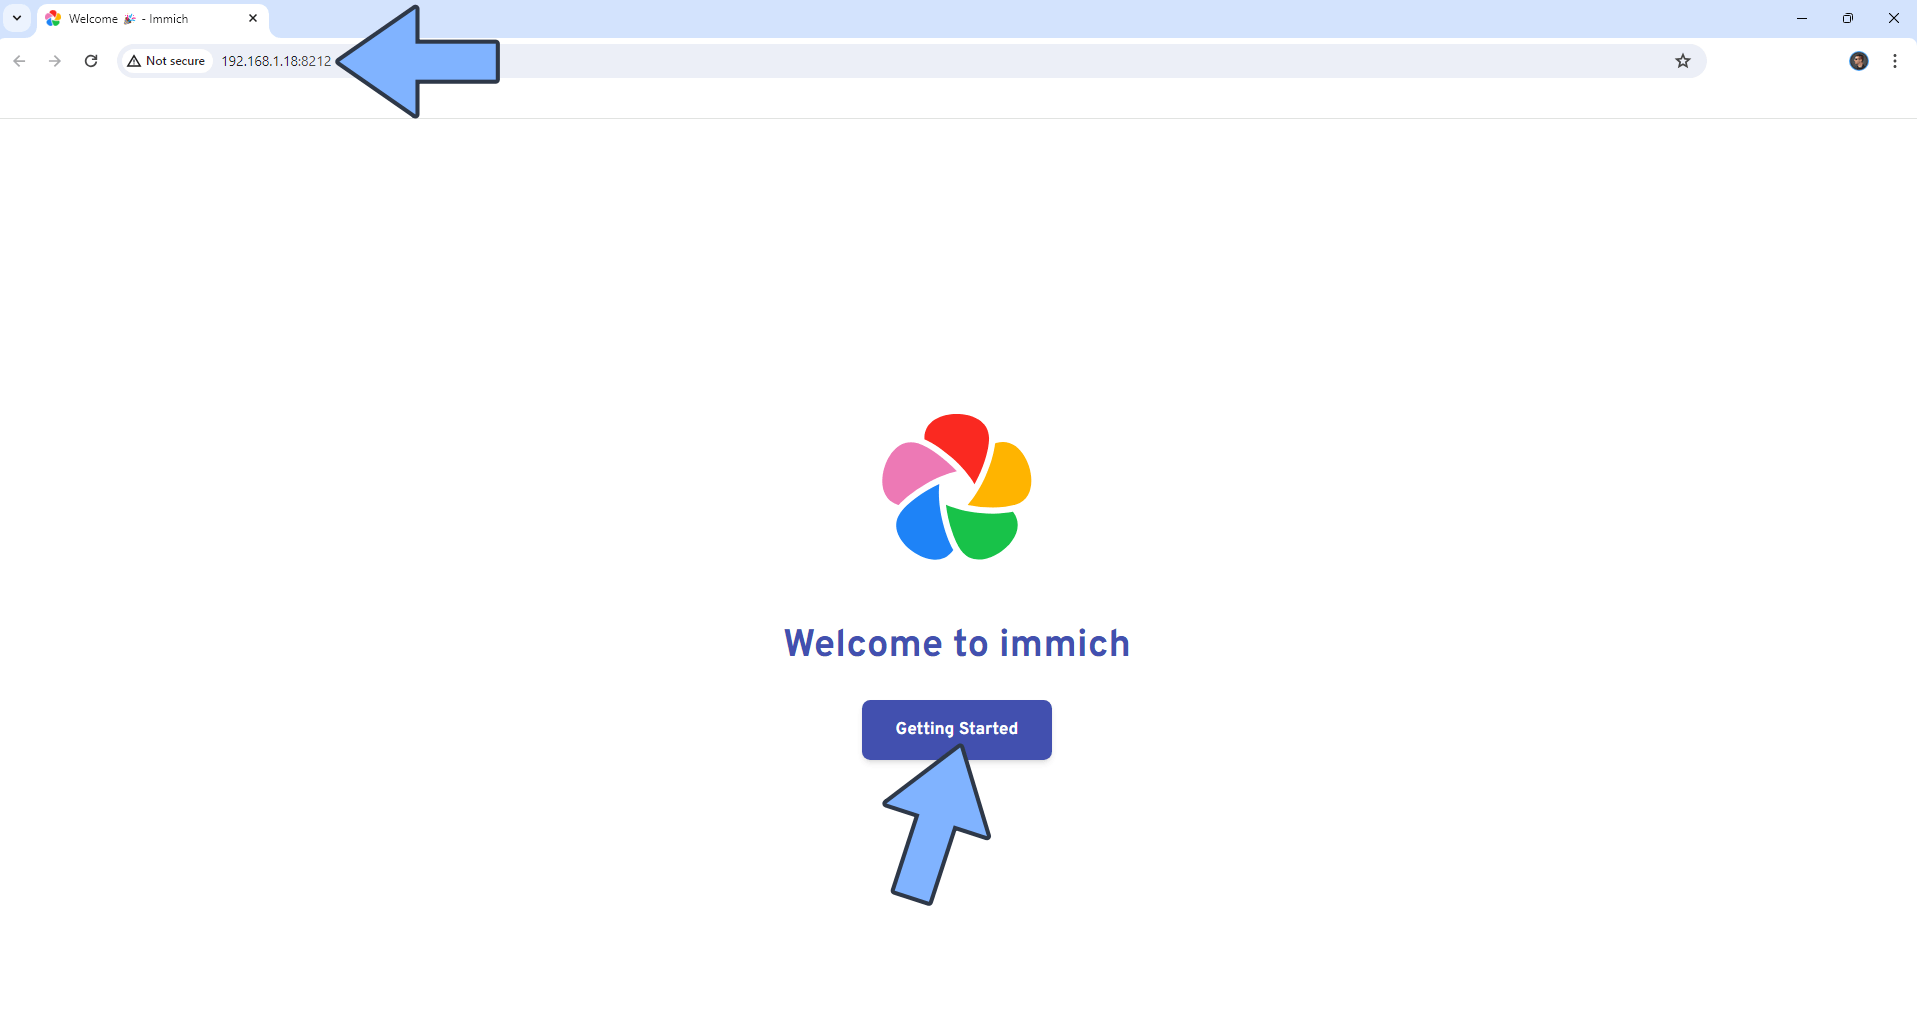
Open your browser and type in http://Synology-ip-address:8212
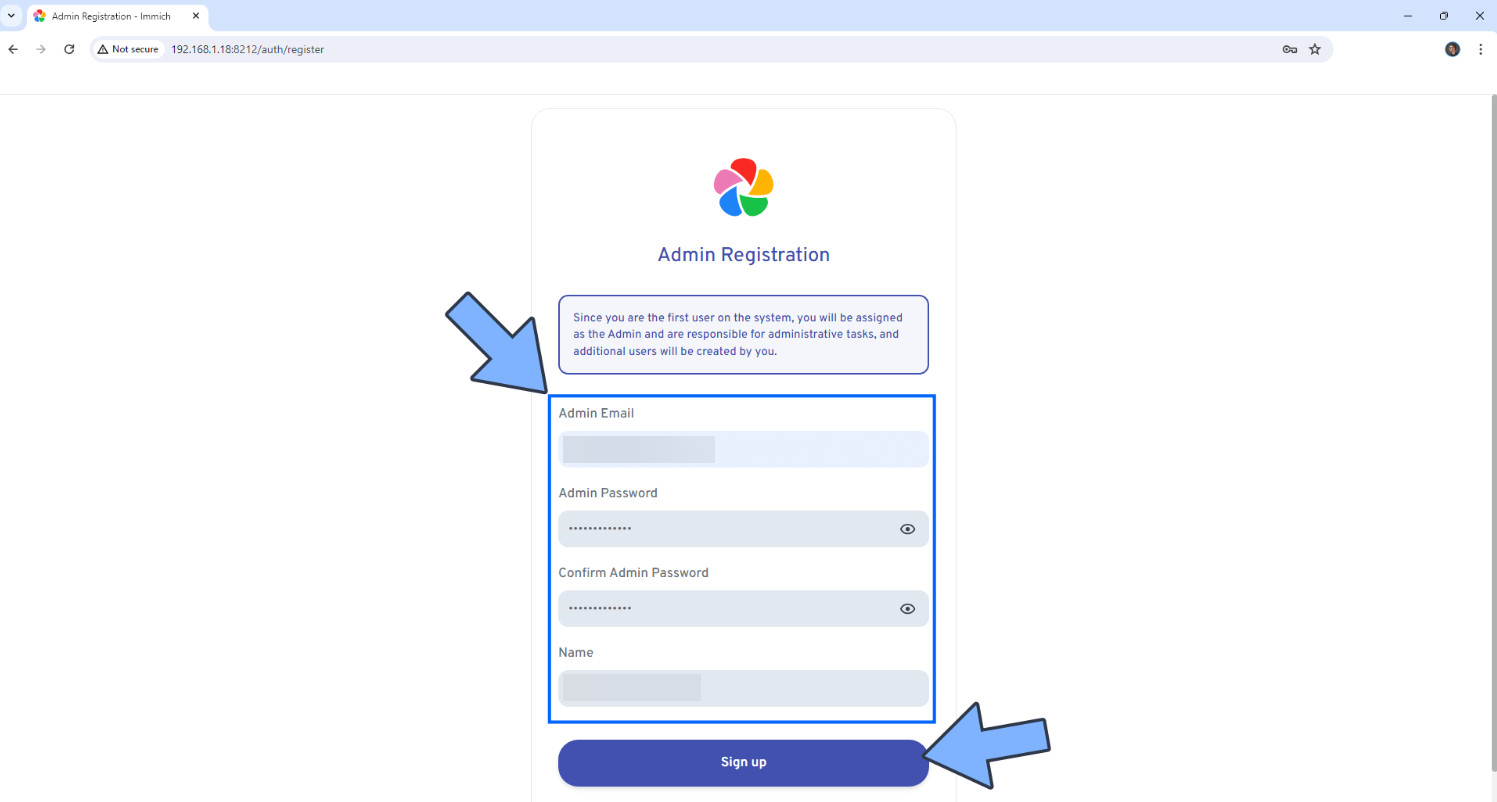
Add your own credentials then click Sign Up
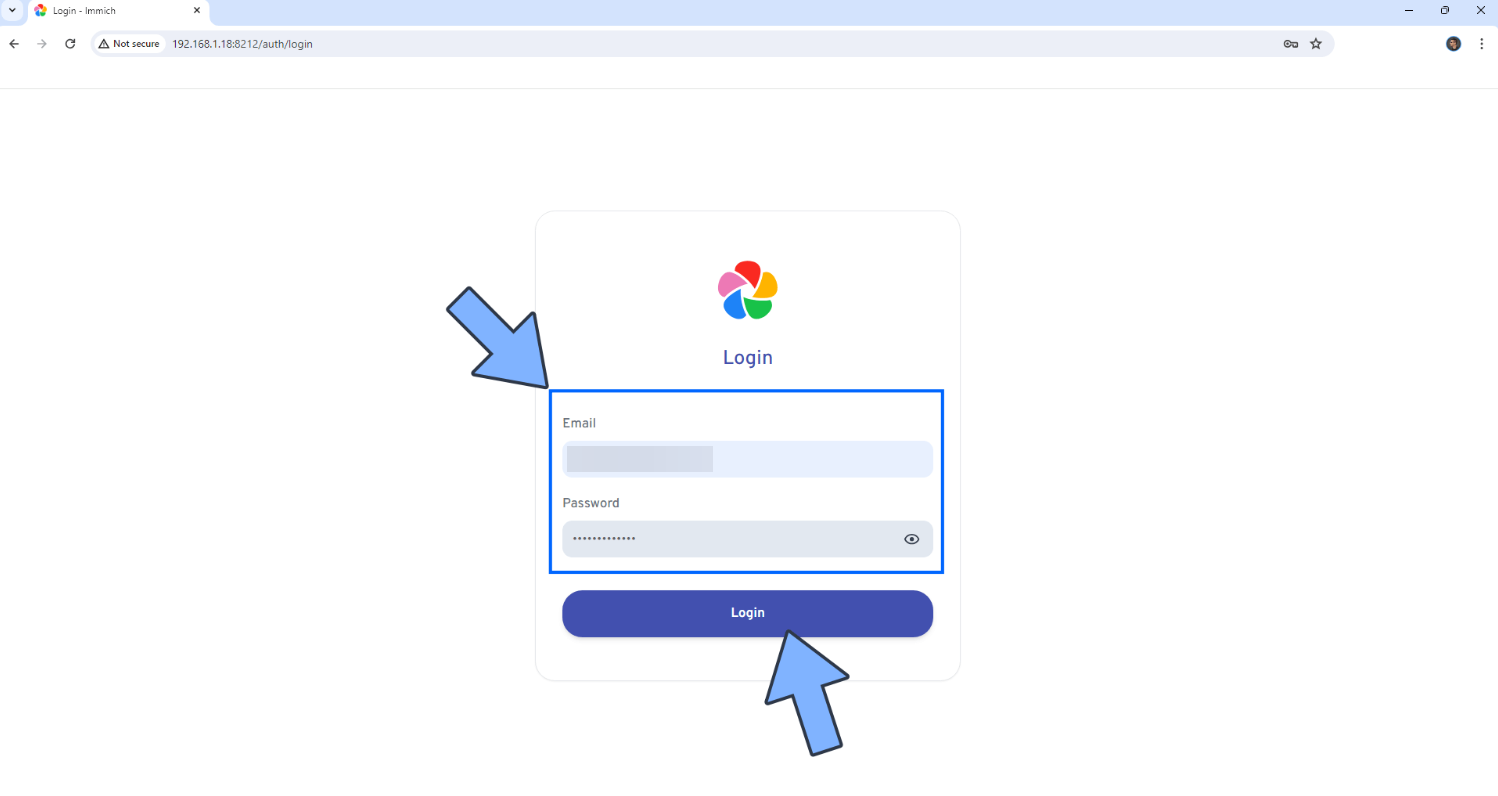
Now you can login
Click Theme > choose your theme > Click Storage Template > Click done
